Monthly Archives: May 2011

Fresh Pineapple Upside Down Cake

May 19, 2011

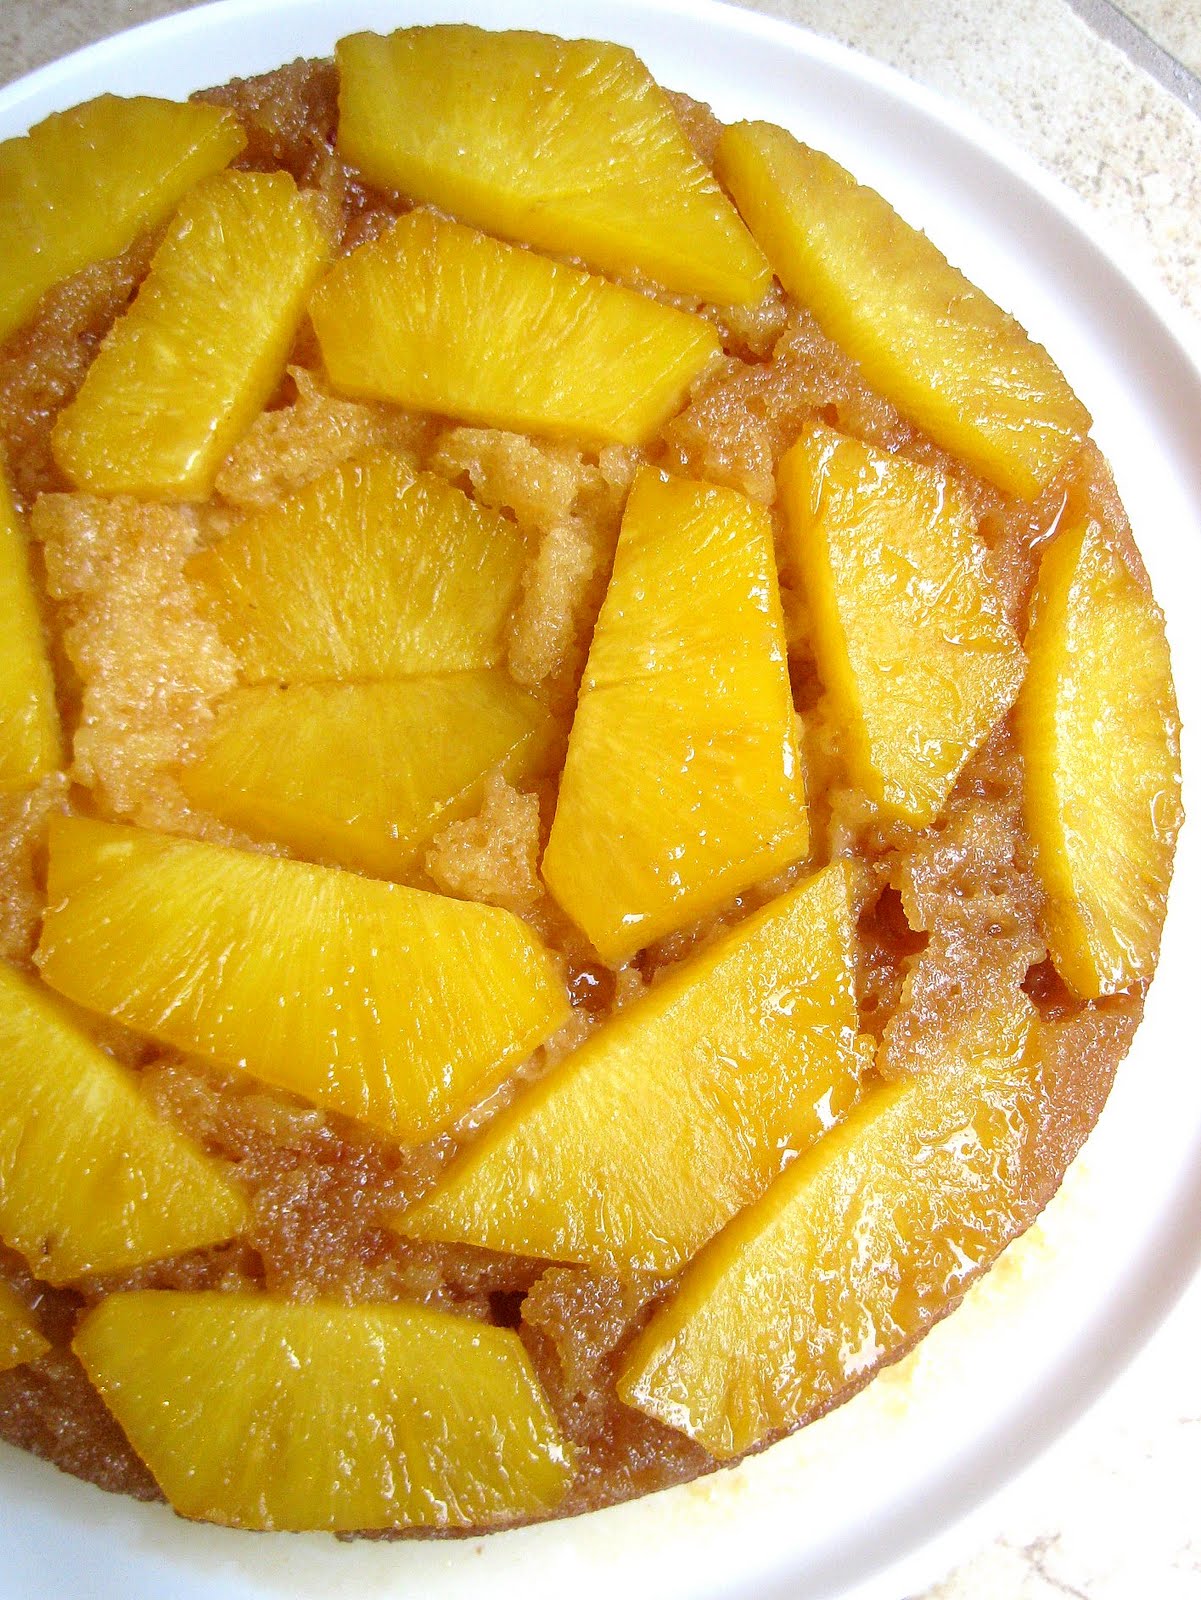
This is one of the best things I’ve tasted in a long time. It’s the first pineapple upside down cake I’ve ever had and boy have I been missing out! I knew when I decided to attempt this classic cake that I would be using fresh pineapple. Forget the limp fruit that comes in a can. Fresh is best. So after consulting two popular recipes, I took what I liked about each and combined them into one. And it was awesome. The cake base was buttery, moist, and not overly sweet. The caramel soaked into the cake and oozed over the sides. And the ripe juicy pineapple turned tender and irresistible. We devoured it warm underneath a scoop (or two) of vanilla bean ice cream.

Fresh Pineapple Upside Down Cake

INGREDIENTS

Topping:
1/2 cup (1 stick) unsalted butter
3/4 cup packed dark brown sugar
1/2 fresh pineapple, cored and sliced

Batter:
1 1/2 cups all-purpose flour
2 tsp. baking powder
1/2 tsp. salt
1/2 cup sugar
6 Tbsp. (3/4 stick) unsalted butter, room temperature
3 eggs, separated
1/2 cup unsweetened pineapple juice
1 tsp. pure vanilla extract
vanilla bean ice cream, for serving

DIRECTIONS

1. Preheat oven to 400 F. Butter a 9-inch round cake pan.

2. Melt one stick of butter and brown sugar in a medium saucepan over medium heat. Simmer, stirring occasionally, four minutes. Remove from heat and pour into the bottom of the prepared cake pan. Arrange pineapple on top of caramel, overlapping slightly.

3. To make the batter, whisk to combine flour, baking powder, and salt and set aside. In a separate bowl, beat egg whites until stiff peaks form and set aside. In a third bowl, cream butter and sugar with an electric mixer until light and fluffy. Add egg yolks and vanilla extract and beat until smooth. Add half of the flour mixture and beat on low until just blended. Beat in the pineapple juice, then add the remaining flour mixture beating until just blended. Fold in the egg whites by hand. Pour batter over the pineapple topping and spread evenly.

4. Bake in preheated oven for 25-30 minutes until golden brown and a toothpick inserted into the center comes out clean. Cool 5-10 minutes before inverting onto a cake platter. Replace any pineapple that sticks to the pan. Serve warm with a scoop of vanilla ice cream.

Makes a 9-inch round cake.

(Adapted from All Recipes and Smitten Kitchen)

Caramelized Onion and Roasted Veggie Pizza

May 17, 2011

Last week I developed a sudden aversion to meat. I couldn’t figure out why the turkey on my sandwich looked so unappetizing or how come a juicy burger was such a turn-off. While I’m not a hard carnivore, I’ve never disliked meat. At first I blamed the warm weather. I thought the heat was causing me to crave lighter, healthier foods. But that seemed silly. And then it hit me. I’ve spent the majority of the last month in an operating room. Around exposed muscle, bone, and tissue. Inhaling the fumes of burning flesh. (Pleasant images, I know.) Hmmm. I’m guessing there’s a correlation here.

Luckily, Dustin has been gracious about my change in appetite and hasn’t complained too much that I’m currently leaning vegetarian. (He confessed to similar feelings after spending a semester of anatomy in the cadaver lab.) So we’re clear- I’m not giving up on meat. I just need a break. (Which would do us all some good on occasion.) Over the weekend I was craving pizza and remembered this favorite recipe I first posted two years ago. Oven-roasted vegetables and sweet caramelized onions are piled high on my homemade pizza dough and smothered in mozzarella and fontina. This time I added mushrooms to the veggie mix. There’s no rule about what to include. All vegetables are welcome here.

6/11/09: I’m especially fond of this pizza because I developed it on my own. I take my inspirations from everywhere, but for the most part, this one came from within! I fall more and more in love with my pizza dough recipe every time I make it, which is very often. I enjoyed this pizza so much that I made it twice in one week (and we know I rarely repeat the same recipe twice within a year)!I’m all about incorporating more vegetables into my diet, and what better way to enjoy them than atop a pizza?! You can roast whatever vegetables you prefer, but I definitely recommend including peppers and squash. The caramelized onions are essential. If you’ve never tried caramelized onions, you are in for a treat. Literally. They are sweet and aromatic and I can’t stop myself from eating them right out of the pan! The Fontina is another required ingredient. I can’t quite describe how it tastes- it just makes all the difference! Basically, don’t make any substitutions or you won’t get the same result. And then I can’t be blamed if your pizza is sub-par.

Another note: I never actually measure how much cheese ends up on my pizza. Just judge for yourself how much is enough. Shoot for a ratio of about half Fontina to half mozzarella.

Caramelized Onion and Roasted Veggie Pizza

INGREDIENTS

1 recipe pizza dough
roasted veggies
2 large yellow onions, thinly sliced
2 Tbsp. extra virgin olive oil, divided
1 1/2 cups Fontina cheese, shredded
1 1/2 cups Mozzarella cheese, shredded

DIRECTIONS

1. Prepare pizza dough according to directions. While pizza dough is rising, roast veggies according to directions (or you can use previously roasted vegetables that have been kept in the refrigerator).

2. In a large pan heat 1 Tbsp. of olive oil over medium heat. Add the onion and saute, stirring occasionally, until caramelized (they will reach a deep golden brown), 25-40 minutes.

3. Place pizza stone in oven and preheat to 450 F.

4. When dough is ready, turn out on to a lightly floured surface to form your crust (see pizza dough directions). Sprinkle parchment paper with cornmeal and place your formed crust on it. Brush the crust with the remaining 1 Tbsp. olive oil. Spread half of the Fontina and mozzarella over the crust. Next layer with the roasted vegetables and caramelized onion. Top with the remaining Fontina and mozzarella.

5. Place pizza onto the preheated pizza stone and bake for 10-12 minutes, until the crust is golden brown and the cheese is bubbling. Remove from the oven and let rest for 5 minutes before slicing.

Makes 1 pizza.

White Chocolate Macadamia Nut Cookies

May 11, 2011

Today I get to scrub in for my first surgery! (Up to this point I’ve been watching from afar.) My goal for today is to stand next to the surgeon and assistants and not get in the way. And not touch anything unsterile. Sound easy? Not when you’re used to being able to move your arms freely or sit down or scratch your nose. One wrong move could get me in trouble. I’m curious to see how this goes…

My mind has been so focused on the operating room lately that I’ve had a hard time writing blog posts. I don’t have as much time to think about food. But over the weekend we celebrated Mother’s Day with my family and my sister and I cooked a big meal. We grilled chicken and vegetable kabobs and baked a creamy cauliflower gratin and homemade rolls (all previously posted recipes). And for dessert I made these cookies (as well as an attempt at fresh strawberry ice cream). The ice cream didn’t live up to my expectations, so I’ll be trying again in the future. But these cookies we loved! Soft and chewy, salty and sweet. With bits of crunchy macadamia and smooth white chocolate strewn throughout. Cookie perfection.

2/18/09: Feeling guilty for leaving Dustin alone the last few days (slaving away in school while I visited my family and got our car fixed, again), I decided to bake him a batch of cookies when I got home tonight! Macadamia nuts are a splurge, so these are a rare treat! In fact, he just walked in the door and exclaimed, “mhh…smells so good!” And now, he keeps repeating between bitefuls, “these are so good!” I predict these morsels of nutty perfection won’t be around for long. I’ll be making a double batch next time.

White Chocolate Macadamia Nut Cookies

INGREDIENTS

1 cup (2 sticks) unsalted butter, room temperature
1 1/2 cups white sugar
2 eggs
2 tsp. pure vanilla extract
2 1/2 cups all-purpose flour
1 tsp. baking soda
1 tsp. salt
1 1/2 cups white chocolate chips
6 oz. macadamia nuts, chopped

DIRECTIONS

1. Preheat oven to 375 F.

2. In a medium bowl, cream the butter and sugar with an electric mixer. Beat in the egg and vanilla. In a separate bowl, whisk to combine the flour, baking soda and salt. Add the flour mixture to the wet ingredients, mixing well. Fold in the white chocolate and nuts. Drop dough by heaping teaspoonfuls onto an ungreased cookie sheet.

3. Bake in preheated oven for 8-10 minutes, until the edges are lightly browned. Cool on wire racks.

Makes 2-3 dozen cookies, depending on size.

(Adapted from All Recipes)