Monthly Archives: March 2012

Barbecue Chicken Pizza

March 14, 2012

I know I’ve posted this pizza twice before. But it deserves the repeat mention, since I’m sure I’ve made it more than any other recipe on this blog. And it’s awesome every time. Never grows old. My go-to meal for pleasing husbands, kids, family, and friends. Trust me that making your own dough makes all the difference (and it’s easier than you think). If you follow the “pizza dough” link I’ve written detailed instructions on the process. Don’t be intimidated by yeast. A little bit of fungus can do wondrous things.

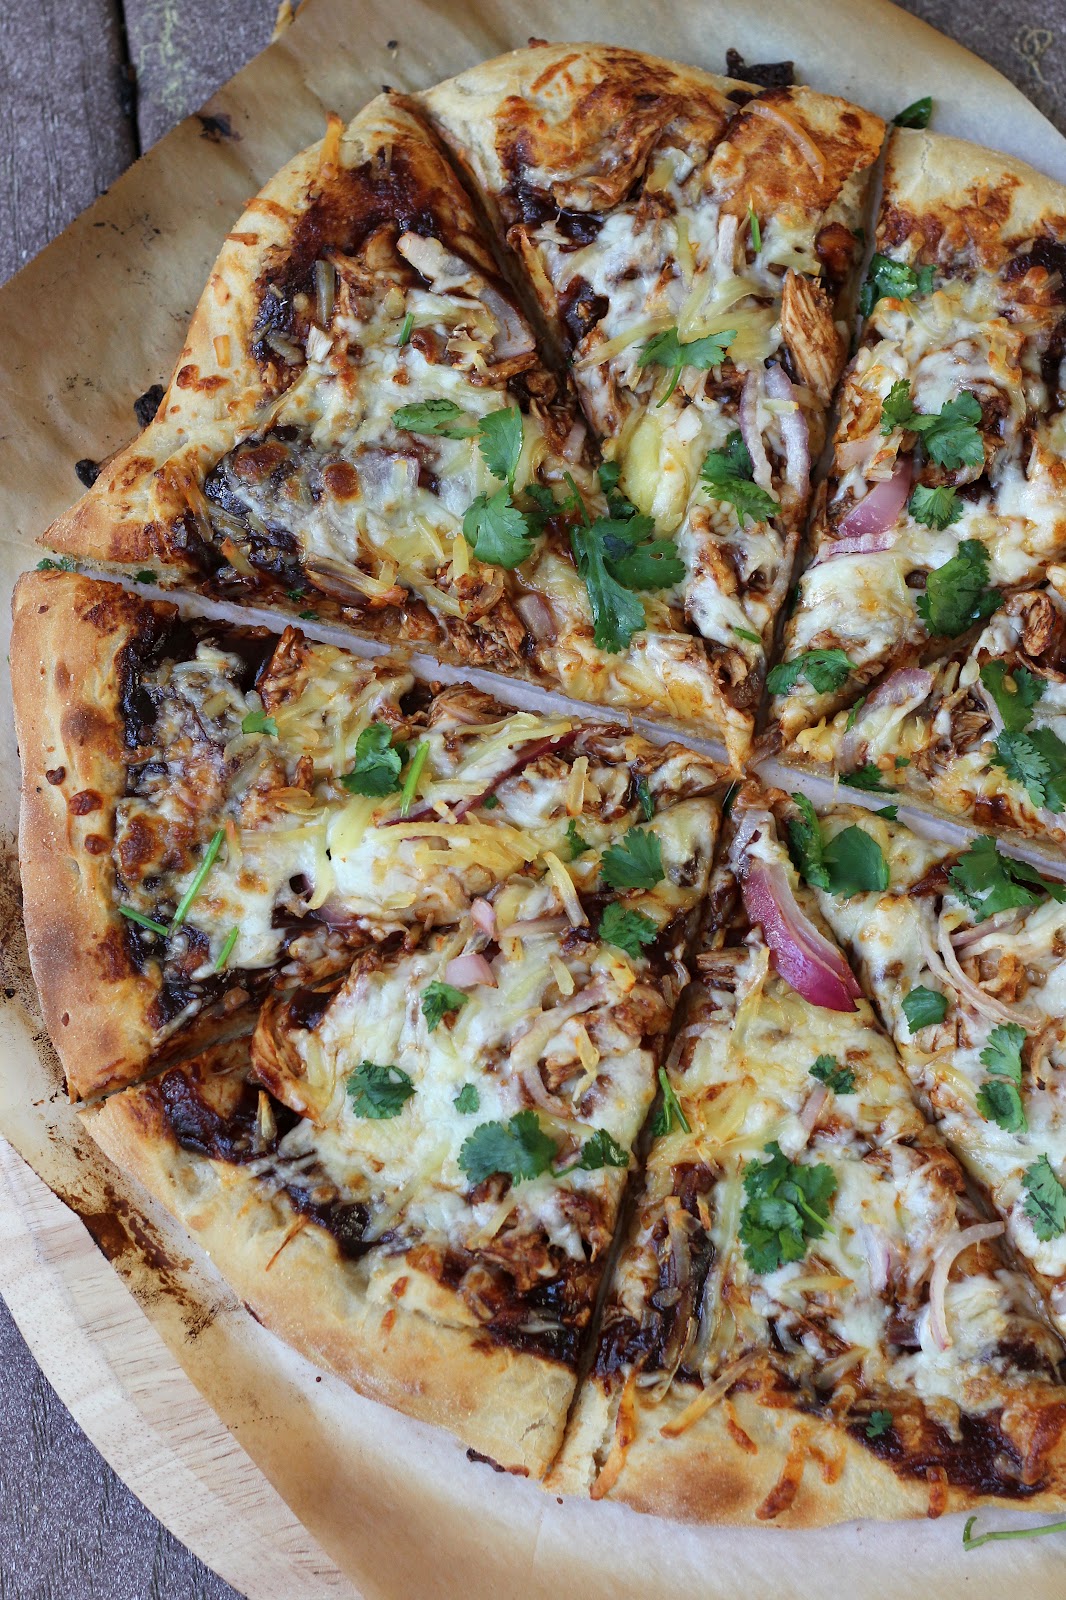
1/31/09: This is my favorite pizza in the entire world. Not exaggerating. Using a high quality barbecue sauce makes a huge difference. (Our current favorite comes from Trader Joes.) The smoked Gouda also sets this recipe apart from its ordinary imitators. When my brother left for Ukraine this pizza was his parting dinner request and he recently wrote telling me he misses it and is going to try making his own foreign version! I’m warning you it’s addicting. I always make extra, hoping there will be leftovers for lunches the rest of the week.

Barbecue Chicken Pizza

INGREDIENTS

1 recipe pizza dough
3/4 cup your favorite barbecue sauce
~1/2 cup smoked Gouda
~2 cups mozzarella
1 cooked boneless, skinless chicken breast half, diced or shredded (see note on preparing chicken)
red onion, thinly sliced (to taste)
fresh cilantro, chopped (to taste)

DIRECTIONS

1. Prepare dough according to recipe directions. While dough is rising you can bake your chicken breast and prep your other ingredients.

NOTE: For tender juicy chicken that won’t dry out while you are baking your pizza, I suggest the following coking method: Preheat oven to 350 F. Season the chicken breast with salt and pepper and drizzle with olive oil. Loosely wrap it in aluminum foil and place it (directly on the rack is fine) in the the preheated oven and bake for 30-40 minutes until the juices run clear. After removing it from the oven let it sit for at least 10 minutes to cool and to let the juices settle before shredding or dicing it. At this point you want to use 1/4 cup of the barbecue sauce to cover the chicken with. This will also help keep it moist and impart more of that delicious bbq flavor! If you are cooking your chicken ahead of time it will keep well in the fridge.

2. See post on pizza dough for instructions on preheating your pizza stone and baking the pizza.

3. Top prepared dough with 1/2 cup bbq sauce, then chicken, red onions, mozzarella, and Gouda.

4. Bake in 450 degree oven for 8-10 minutes until crust is lightly browned and cheese is bubbly.

5. Remove from the oven and let rest a few minutes before slicing. Garnish with fresh cilantro.

Makes 1 pizza.(Inspired by California Pizza Kitchen)

Pineapple Pulled Pork Sandwiches

March 7, 2012

This was the main event in our family dinner Sunday. Something I could throw together the night before and have on the table with the littlest of effort the next day. My sister declared it her favorite pulled pork ever. And I’d have to agree that the flavors here are pretty perfect. Just a bit smokey. Ever-so-slightly sweet. Even spicy if you up the pepper flakes (I was conservative in this regard because baby-on-the-way doesn’t appreciate heat). Served with this salad and these sweet potatoes.

Pineapple Pulled Pork Sandwiches

INGREDIENTS

3-4 lbs. pork shoulder (Boston butt), cut into 2-inch cubes
1 onion, diced
1/2 cup ketchup
1/3 cup cider vinegar
1/4 cup brown sugar
1/4 cup tomato paste
2 Tbsp. worcestershire sauce
2 Tbsp. sweet paprika
2 tsp. salt
1 tsp. freshly ground black pepper
1 tsp. crushed red pepper (or more to taste)
20 oz. can crushed pineapple

soft wheat sandwich rolls, for serving

DIRECTIONS

1. Combine all ingredients in a large slower cooker. Cover and cook on low for 8 hours until tender.

2. Remove the pork from the liquid and let the liquid cool before skimming the fat off the top. Meanwhile, remove the bones and gristle and shred the pork with two forks. Return the pork and some of the juices to the slower cooker to keep rewarm. Serve on soft wheat sandwich rolls.

Serves 6-8.

(Adapted from What’s Gaby Cooking)

Homemade Butterscotch Ice Cream

March 6, 2012

This ice cream was devoured before I could snap a picture of it. So I’m posting the recipe photo-less, since it was too good not to be shared. My family was visiting for the weekend and my mom baked my favorite German Chocolate Cake (an early birthday celebration). And I picked this ice cream to accompany it. It was the perfect duo. Rich chocolate cake with boiled coconut-pecan frosting and light creamy butterscotch delight. It was excellent served soft right from the ice cream machine as well as spooned from the freezer a few days later.

Butterscotch Ice Cream

INGREDIENTS

1 cup brown sugar
2 Tbsp. butter
1 Tbsp. pure vanilla extract
1 1/2 cups whipping cream
2 cups half and half
6 large egg yolks

DIRECTIONS

1. In a saucepan over medium heat, stir brown sugar, butter, and vanilla until butter is melted, sugar is dissolved, and mixture is bubbly, 3 to 4 minutes. Whisk in 1/2 cup whipping cream until smooth; remove butterscotch mixture from heat.

2. In a separate saucepan over medium-high heat, combine remaining 1 cup whipping cream and the half-and-half; bring to a simmer.

3. Meanwhile, in a bowl, beat egg yolks to blend. Whisk 1/2 cup of the warm cream mixture into egg yolks, then pour egg yolk mixture into pan with cream. Stir constantly over low heat just until mixture is slightly thickened, 2 to 4 minutes. Immediately remove from heat.

4. Pour through a fine strainer into a clean bowl and whisk in butterscotch mixture. Chill until cold, stirring occasionally, about 2 hours; or cover and chill up to 1 day.

5. Freeze mixture in an ice cream maker according to manufacturer’s instructions. Serve softly frozen, or transfer ice cream to an airtight container and freeze until firm, at least 6 hours or up to 1 week.

Makes about 1 quart.

(Adapted from Sunset via Smitten Kitchen)

Spinach Salad with Oranges, Avocado, and Pistachios

March 5, 2012

As much as I’m ready for spring and relishing these 70 degree days (well, yesterday was warm and sunny- today it’s snowing), I’m still enjoying winter eating. This season brings the best of citrus and what better way to enjoy an orange than in a tangy-sweet salad accompanied by creamy avocado and nutty pistachios. I whipped together a honey-orange vinaigrette to drizzle atop. I was hosting (half) my family for dinner and this salad disappeared quick. A new winter favorite.

Spinach Salad with Oranges, Avocado, and Pistachios

INGREDIENTS

6 oz. baby spinach
6 oz. mixed greens
2-3 navel oranges
2 avocados, pitted and diced (toss in a squeeze of orange juice to prevent browning)
pistachios, toasted

Honey-Orange Vinaigrette:
2 Tbsp. orange juice
1 Tbsp. white wine vinegar
1 tsp. Dijon mustard
1 tsp. honey
3 Tbsp. extra virgin olive oil
salt and freshly ground black pepper, to taste

DIRECTIONS

1. To make the vinaigrette, whisk to combine the orange juice, vinegar, Dijon and honey. Slowly stream in the olive oil while whisking constantly to emulsify. Season to taste with salt and freshly ground black pepper.

2. In a large bowl combine spinach, mixed greens, oranges, avocado, and pistachios. Drizzle with vinaigrette, toss, and serve.

Serves 6-8.

(Adapted from Serious Eats)