Category Archives: Cake

Red Velvet Cupcakes with Cream Cheese Frosting

February 28, 2014

IMG_3694

This was my Valentine’s treat to myself. And Dustin and Clara. But I never know for sure if Dustin will like a dessert I make, unless it’s chocolate chip cookies or  a brownie without nuts or frosting. He’s picky about his cake, can’t handle anything too rich or chocolatey (there is no such thing), and claims to dislike any dessert tainted with fruit, raisins, or coconut. Except that he usually eats them anyway. I don’t know what to believe so I continue baking what I please and just deal with the occasional complaints. Clara will eat anything sweet. Despite years of suggesting he learn to cook, bake, make anything, Dustin is still lost in the kitchen. So if I want a homemade holiday treat (or any meal, for that matter), I have to make it myself. I’ll be baking my own birthday cake next week. I’ve done so almost every year since we’ve been married- except for last year when we picked up german chocolate cupcakes from a local bakery (which are my favorite, Dustin can’t stand the frosting).

red velvet cupcake

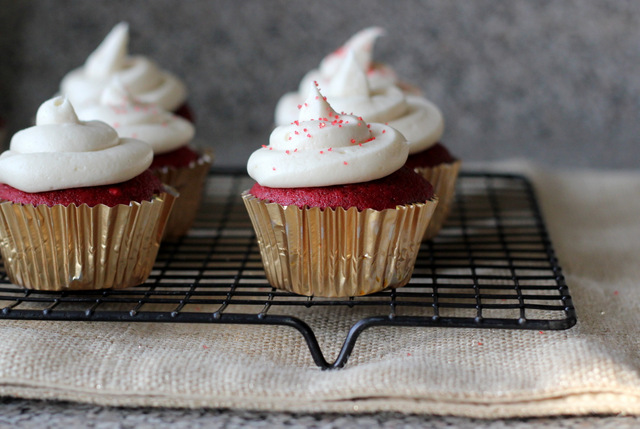
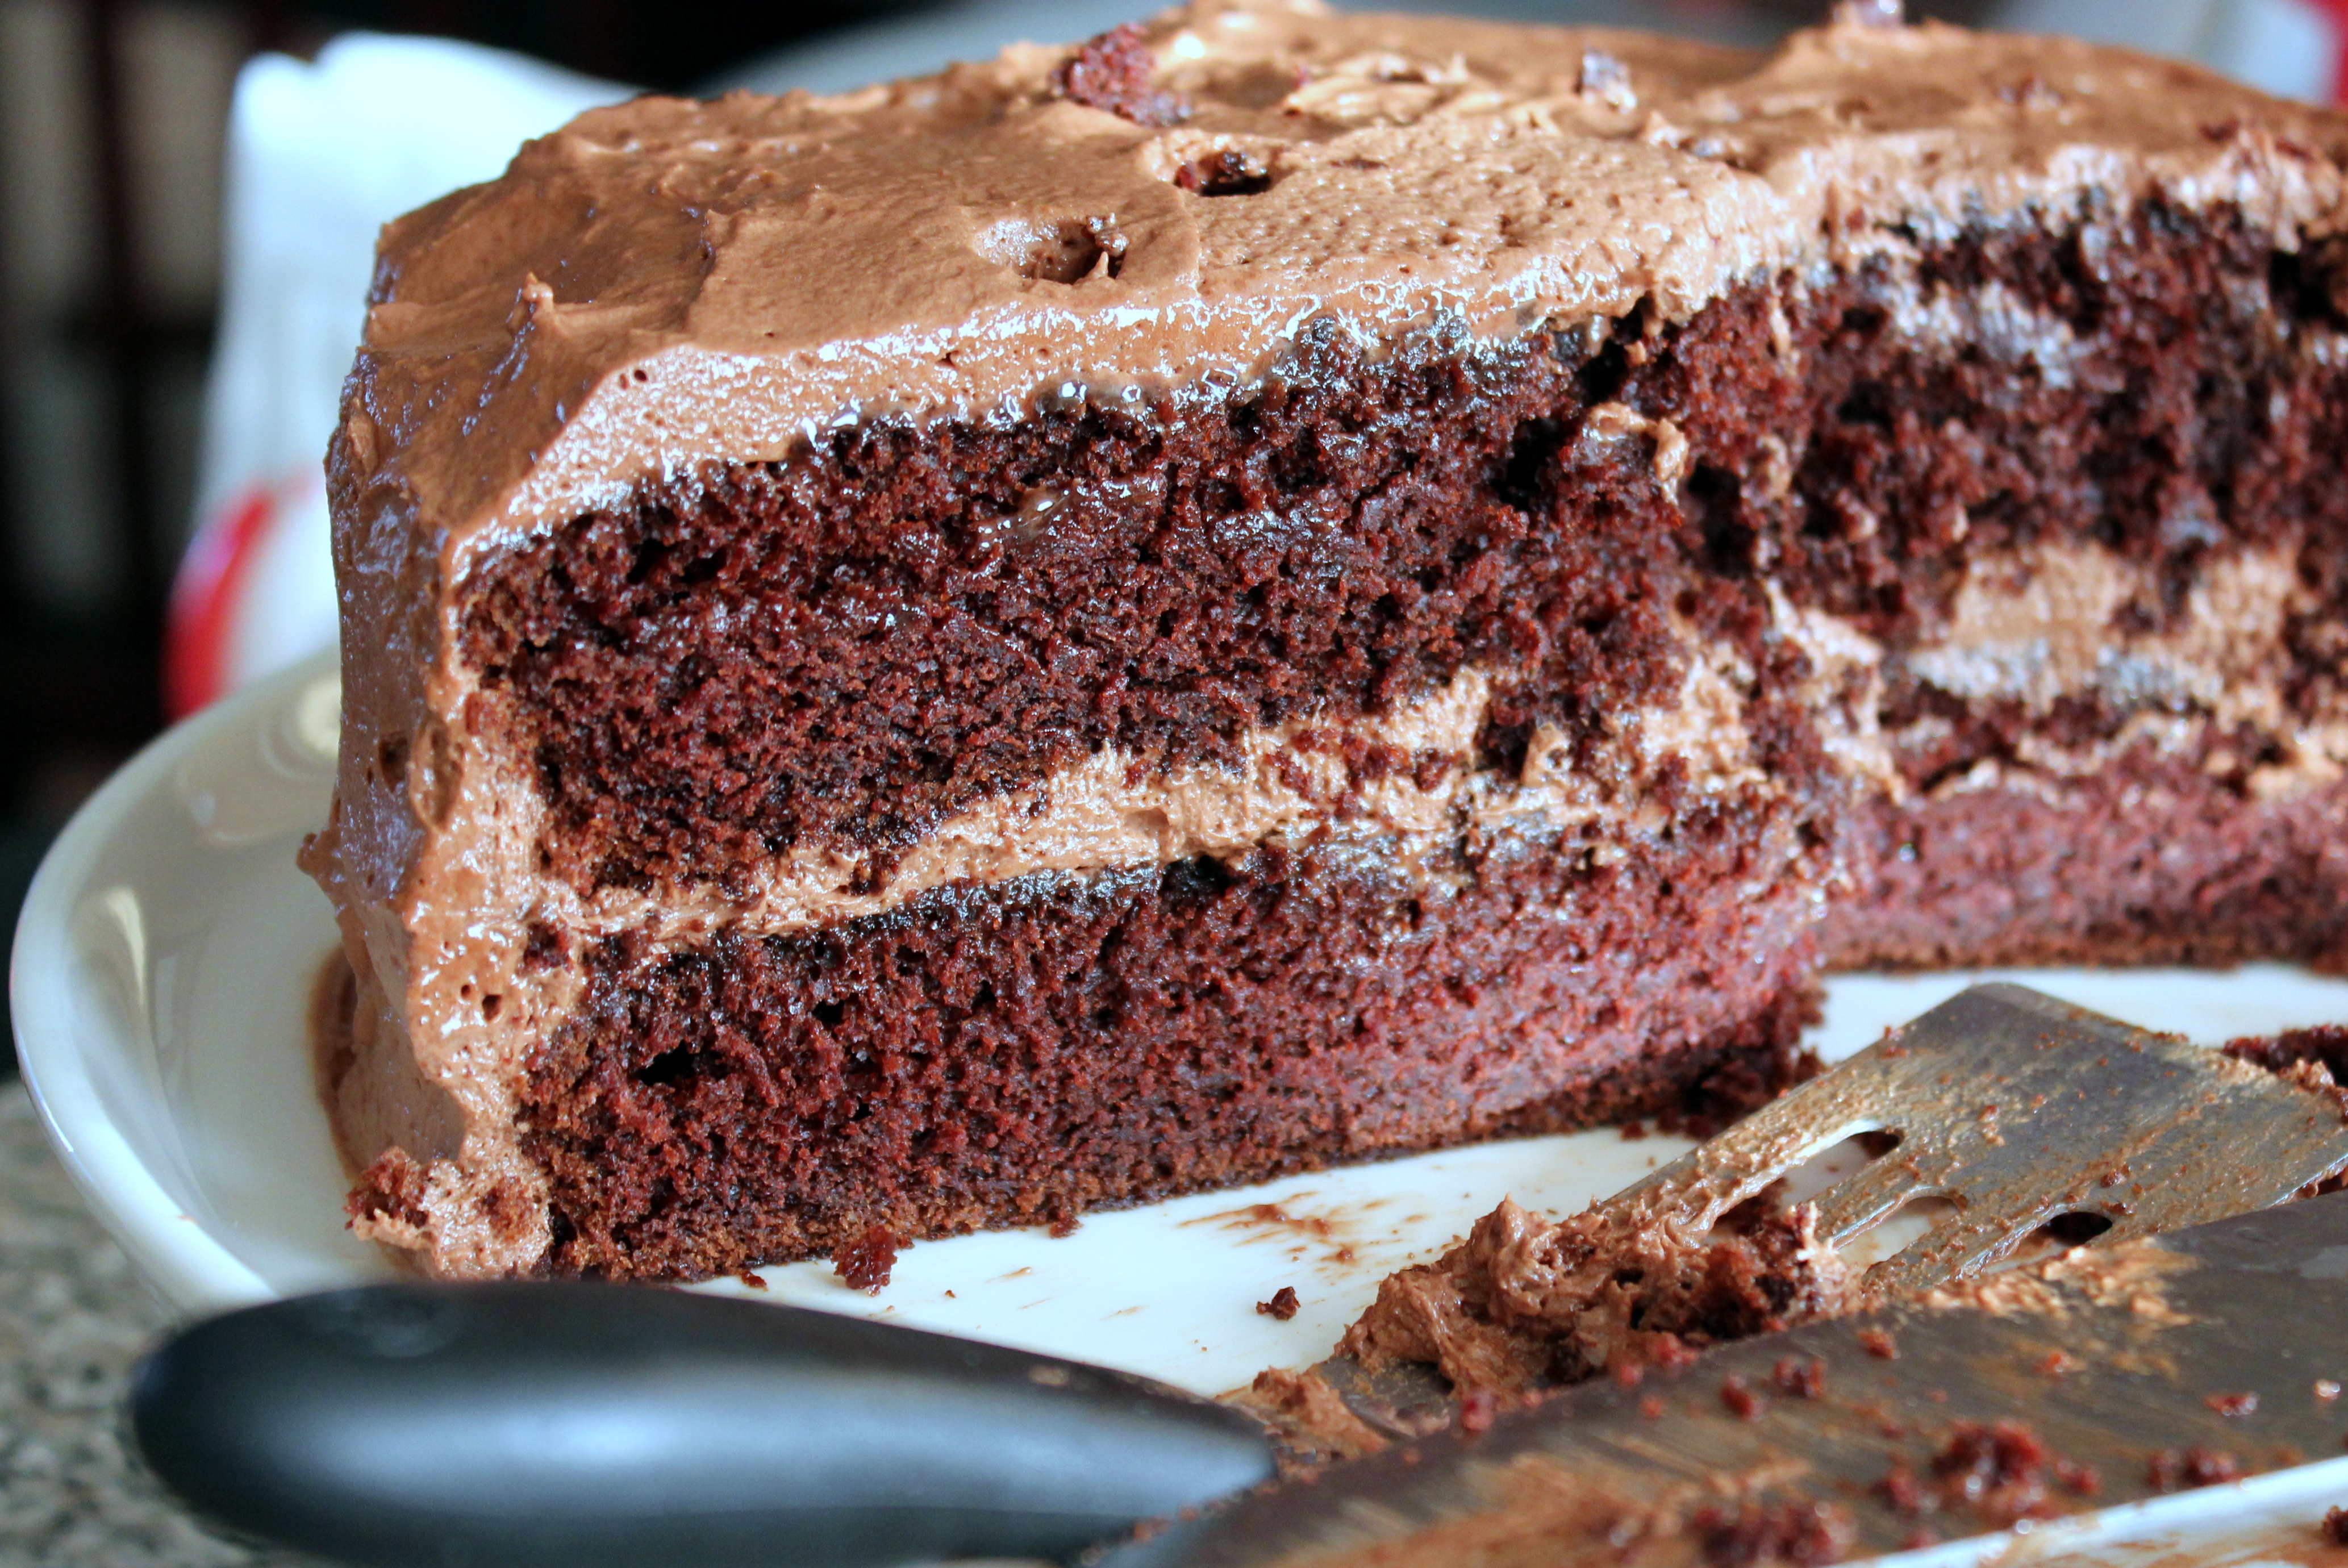
These red velvet cupcakes were approved by every member of the family. It was my first red velvet cake (I’ve made a whoopie pie version before) and needn’t look further. The cupcakes were soft and fluffy and not at all dry. And I could have eaten a whole bowl of the cream cheese frosting. It would be a great compliment to so many cakes- carrot, spice, hummingbird, chocolate. But let’s stop talking about cake. I’m suddenly very hungry.

Collages3

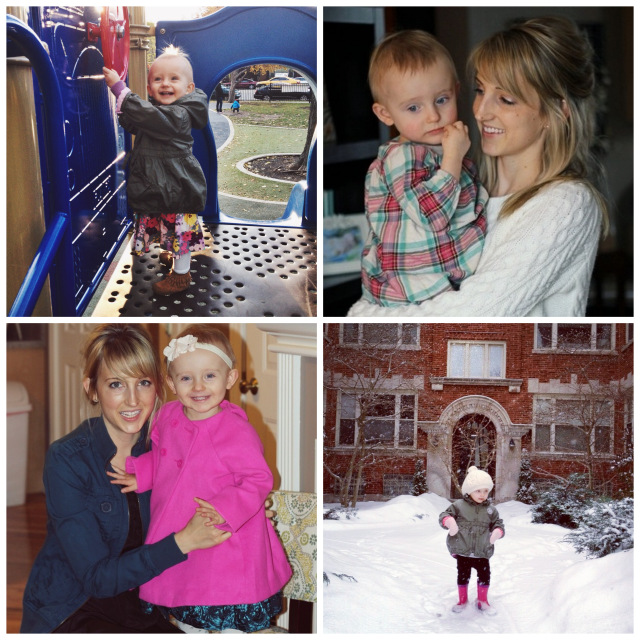
I realized I haven’t posted any photos of Clara (or myself) on here in a very long time. She’s no longer a baby and perhaps some of you would like to see us once and a while. Here a few shots from my private Instagram feed. Clara is 2 months shy of 2 and talks like she’s grown up already.

Red Velvet Cupcakes with Cream Cheese Frosting

INGREDIENTS

Red Velvet Cupcakes:
4 Tbsp. unsalted butter, at room temperature
3/4 cup sugar
1 egg
2 1/2 Tbsp. unsweetened cocoa powder
2 Tbsp. red food coloring
1/2 tsp. pure vanilla extract
1/2 cup buttermilk
1 cup + 2 Tbsp. all-purpose flour
1/2 tsp. salt
1/2 tsp. baking soda
1 1/2 tsp. distilled white vinegar

Cream Cheese Frosting:
4 oz. butter, at room temperature
4 oz. cream cheese, at room temperature
2 1/2 cups powdered sugar
2 tsp. pure vanilla extract
scant 1/4 tsp. ground cinnamon (optional)

DIRECTIONS

1. Preheat oven to 350 F. Line a 12-cup muffin/cupcake pan with liners.

2. In a large bowl with an electric mixer, cream the butter and sugar until light and fluffy, about 3 minutes. Turn the mixer to high and add the egg. Beat until well incorporated, scraping down the sides of the bowl if necessary.

3. In a separate small bowl, mix together the cocoa powder, vanilla extract, and red food coloring to make a thick paste. Add to the batter and mix on medium speed until well combined, stopping the mixer to scrape down the sides of the bowl if necessary.

4. Reduce the mixer speed to low and add half of the buttermilk. Add half of the flour and mix until combined. Scrape the bowl if necessary and add the remaining buttermilk and flour. Beat on high until smooth. Reduce the mixer speed to low and add the salt, baking soda, and vinegar. Turn to high and beat for another couple minutes until completely smooth.

5. Divide the batter evenly between the cupcake liners and bake for 15-20 minutes, until a toothpick inserted into the center of a muffin comes out clean. Cool for several minutes in the pan before removing the cupcakes to a wire rack to cool completely before frosting.

6. To make the frosting, beat or whisk butter and cream cheese in a large bowl with an electric mixer on medium-high speed for 5 minutes. Reduce the speed to low and slowly add the powdered sugar until well incorporated. Add the vanilla and cinnamon (if using) and mix to combine. Increase the speed to medium-high and whip for a few more minutes until the frosting is light and fluffy, scraping down the sides of the bowl if necessary.

Makes 12 cupcakes and more than enough frosting (recipe and frosting can be doubled to make an 8 or 9-inch layer cake).

(Adapted from Brown Eyed Baker and Joy the Baker)

Sunday Chocolate Cake

January 23, 2014

chocolate cake

There has been a lot of sick and not a lot of sleep around here this week. Baby girl had croup, I’ve got crazy headaches, and Chicago is in a serious deep freeze. So I haven’t been motivated to get much done lately, cooking and blogging included.

This past summer we moved into a new apartment, which I love overall. But we now live on the third floor- almost fourth considering the first floor isn’t at ground level- with no elevator. And the stairs with access to our garage (having a garage is heavenly though) are outside and exposed to the cold and wind and snow. And I have a 21-month-old that can’t climb them on her own. This means me + overstuffed purse + baby + groceries up and down those slippery icy stairs. You’d think I’d be in incredible shape. But what it really means is I avoid going out frequently, if at all when it’s particularly treacherous.  And I can’t buy much at once and have a perpetually empty fridge, despite visiting the grocery store practically every day. Some things just aren’t convenient about the city.

I suppose I should mention that I really enjoy Chicago. Dustin often reminds me how much I’ll miss the city and probably think the suburbs (or wherever we end up) is so boring in comparison. It’s true. This is a fantastic, exciting place. I could just do without the winter.

On to more pertinent things…

I’m hoping to finish a post within the next week that will include my first GIVEAWAY! I’d like the details to be a surprise, but I’ve want to give you, my readers, a little gift of appreciation and I’ve found just the recipe to include it with. (So stay tuned…)

Over our sick and snowy weekend I cheered myself up with some chocolate cake. The original author called it “Sunday Chocolate Cake” and since I made it on a lazy Sunday afternoon, it seems fitting. It takes minimal effort and doesn’t require any fancy ingredients (or a mixer- just a stove and saucepan). I halved the recipe because it was just the three of us and a 9×13 pan-full sounded like too much cake. My husband who has been hoarding the leftovers would disagree. But it was a smart move- we would have not been able to resist eating the entire thing.

Sunday Chocolate Cake

INGREDIENTS

Cake:
2 cups sugar
2 cups all-purpose flour
1/2 tsp. salt
1 tsp. baking soda
2 eggs
1 1/2 cups whole milk
1 Tbsp. white vinegar
2 tsp. pure vanilla extract
1 cup butter
1/4 cup cocoa powder

Frosting:
1/2 cup butter (if using unsalted, add a pinch of salt)
1/4 cup cocoa powder
6 Tbsp. milk
5 cups powdered sugar
2 tsp. pure vanilla extract

DIRECTIONS

1. Preheat oven to 400 F. Butter or grease a 9×13 baking pan.

2. In a large bowl, whisk together sugar, flour, salt, and baking soda and set aside. In a separate bowl, whisk together the eggs, milk, vinegar, and vanilla and set aside.

3. In a saucepan over medium heat, melt the butter and cocoa powder together, whisking until completely smooth. Remove from the heat and pour into the flour mixture and then add the other liquid ingredients. Mix until completely smooth (no more lumps).

4. Pour into the prepared baking pan and bake in preheated oven for about 15 minutes, until the center of the cake is set. While the cake is baking, prepare the frosting.

5. To make the frosting, melt the butter, cocoa powder, and milk together in a saucepan over medium heat (you can use the same saucepan from above). Bring just to a boil and remove from the heat. Whisk in the powdered sugar and vanilla until there are no lumps.

6. As soon as the cake comes out of the oven, pour the icing over top of the cake, spreading to the edges if necessary. All of the cake to cool before slicing and serving.

(NOTE: This cake will keep for several days at room temperature or can be frozen and reheated at room temperature or in the microwave.)

Makes a 9×13 cake (or is easily halved to fit an 8×8 pan).

(Adapted from Cookies and Cups)

Coconut Tres Leches Cake

October 29, 2013

tres leches cake

This one I never considered making before I made it. And then immediately regretted the 20+ years I’ve lived without it. I know that sounds dramatic. After all, it is just a dessert. But it’s a shame to be missing out on something this wonderful. I suspect there are less-than-spectacular tres leches cakes out there. But this was the first I’ve tasted and I (we) loved it. I think you’ll be wowed as well.

I came across this coconut tres leches cake searching for a dessert to pair with tacos. I went all out a couple Sundays ago and slow-cooked a pork shoulder and fixed an array of toppings, and felt the need to serve a Mexican-themed final course. This recipe was highly touted on CHOW and I barely messed with it except for the addition of some cinnamon (don’t skip it!) and using vanilla extract instead of Bourbon. The coconut was the highlight for me. Coconut milk is one of the “tres leches” (three milks) and the whipped cream smothered cake is topped with toasted coconut flakes. Despite the detailed instructions, it is quite simple to make. And perfect for a party since it must be prepared ahead of time and allowed to refrigerate.

Coconut Tres Leches Cake

INGREDIENTS

butter, for coating the baking dish
1 cup all-purpose flour
1/4 tsp. cinnamon + extra for dusting
6 large eggs
1 cup sugar
1 14-oz. can sweetened condensed milk
2/3 cup evaporated milk (not nonfat)
1/2 cup unsweetened canned coconut milk (not light)
1 1/2 tsp. pure vanilla extract, divided
1 cup sweetened flaked coconut
1 1/2 cups heavy whipping cream
1 Tbsp. powdered sugar

DIRECTIONS

1. Preheat oven to 325 F and arrange a rack in the middle. Coat a 9×13-inch glass baking dish with butter; set aside.

2. Combine the flour and cinnamon in a small bowl and whisk to aerate and break up any lumps; set aside.

3. Separate the eggs, placing the yolks in the bowl of a stand mixer. Reserve the whites in a separate, very clean, medium bowl. Add the sugar to the yolks and, using the paddle attachment, beat on high speed until pale yellow, about 5 minutes. Transfer the mixture to a large bowl; set aside. Thoroughly clean and dry the stand mixer bowl. Place the egg whites in the clean bowl and, using the whisk attachment, whip on high speed until medium peaks form, about 1 1/2 minutes.

4. Using a rubber spatula, stir about a third of the egg whites into the yolk mixture to lighten it. Then gently fold in the remaining whites. Sprinkle the flour over the egg mixture and gently fold it in, just until there are no more white flour streaks. (Do not overmix.)

5. Pour the batter into the prepared baking dish and bake until the cake is puffed and golden and the edges pull away from the sides of the pan, about 20 minutes.

6. Meanwhile, place the three milks and 1 tsp. of the vanilla extract in a large bowl and whisk until combined; set aside.

7. Remove the cake from the oven and place on a wire cooling rack. Using a toothpick or wooden skewer, poke holes all over the cake and allow to cool for 15 minutes. Pour the milk mixture evenly over the cake and continue cooling, about 45 minutes more. Tightly cover with plastic wrap and refrigerate at least 4 hours or overnight.

8. When the cake is ready to serve, spread the coconut in an even layer in a large frying pan. Toast over medium heat, stirring often, until lightly browned and fragrant, about 5 minutes. (If the coconut begins to burn, reduce the heat.) Immediately remove from the pan to a small bowl.

9. Place the heavy cream and powdered sugar in large bowl and whisk until medium peaks form, adding the remaining 1/2 tsp. vanilla extract halfway through whipping. Slice the cake and serve topped with a mound of whipped cream, a sprinkle of toasted coconut, and a dusting of cinnamon. (Cake will keep for several days tightly covered in the refrigerator.)

Makes a 9×13 inch cake.

(Adapted from CHOW)

Peaches and Cream Pound Cake

August 27, 2013

peach pound cake

Oh, this cake. I waited a whole year to make it. My friend Jenna shared the recipe last fall, just after peaches disappeared, and I sat around all winter and spring dreaming of summer and juicy fresh peaches and putting them in pound cake. Yes, that is the type of thing I think about. (When I’m not defining my strategy for getting a baby toddler to sleep past 5 am. If you have solved this one- please enlighten me.) And as anticipated, summer finally arrived and with it just what I needed to bake this perfect summer treat.

I melded two recipes- or actually, three- into my ideal version and call it “peaches and cream pound cake”. The cream portion comes from sour cream in the batter and sweetened whipped cream that you should definitely serve on top. There’s a bit of cinnamon and vanilla and almond in there as well. Everything wonderful. While it was worth the wait, I recommend you make this now. Before summer eludes you too.

Peaches and Cream Pound Cake

INGREDIENTS

1 cup butter
2 cups sugar
3 large eggs
2 3/4 cups all-purpose flour + 1/4 cup flour for dusting peaches
1/2 tsp. baking soda
1/2 tsp. cinnamon
1/2 tsp. salt
2 tsp. pure vanilla extract
1/4 tsp. almond extract
1 cup sour cream
2 1/2 cups fresh peaches, pitted and diced (with or without skins- I left them on)

DIRECTIONS

1. Preheat oven to 325 F. Butter a 10-inch bundt pan and coat with white sugar.

2. In a large bowl with an electric mixer, cream butter and sugar until light and fluffy. Add the eggs, one at a time, beating well with each addition. Stir in the sour cream, and vanilla and almond extracts. In a separate bowl, sift together the flour (reserving 1/4 cup for the peaches), baking soda, cinnamon, and salt. Gradually stir into the creamed mixture (I added it slowly with the mixer on low). Toss the diced peaches in the reserved flour to coat, then fold into the batter. Spread evenly into the prepared pan.

3. Bake in preheated oven for about 60 minutes, until a toothpick inserted into the center comes out clean. Cool in the pan on a wire rack for 20 minutes, before removing the cake from the pan to cool completely. Dust with powdered sugar and serve with fresh sliced peaches and sweetened whipped cream.

(Adapted from A Spicy Perspective and All Recipes via Lahatchita Eats)

Lemon Ricotta Pancakes

August 6, 2013

lemon ricotta pancakes

If I had to choose only one meal to eat every day, it would no doubt be breakfast. For one thing, I wake up ravenous. I usually eat an early dinner (Dustin calls it senior citizen hour. It’s usually us and the cute elderly crowd when we dine out.), so by the morning hours I’m hungry. But it’s really because I couldn’t live without pancakes. Or french toast or waffles or eggs. Or cinnamon rolls. Most of which, let’s be honest, are the equivalent of dessert. But since it’s socially acceptable to eat them- slathered in butter and syrup, even frosting- first thing in the morning, I fully embrace it! Plus, breakfast doesn’t have to be sweet. Put an egg on it and call it brunch. I can have tacos or pizza well before noon any day. (Why is it that an egg on anything make it that much more amazing?)

So pancakes. They can be healthy. I usually lean that way. But every once and a while they live up to their name and are truly a treat. Like these. These sweet, buttery, lemony ricotta pancakes. I topped mine with tart Greek yogurt, fresh berries, and a dusting of powdered sugar. A blissful start to the day.

p.s. A Hint of Honey is now on Instagram! You’ll find me here @hintofhoney.

Lemon Ricotta Pancakes

INGREDIENTS

5 Tbsp. unsalted butter
1 cup milk (I used low-fat milk)
1 1/4 cups all-purpose flour (I used half white whole wheat and half all-purpose flour
1 1/2 tsp. baking powder
1 tsp. salt
3 large eggs, yolks and whites separated
2 Tbsp. sugar
1 Tbsp. lemon zest (about 2 lemons)
1/2 tsp. pure vanilla extract
1/2 cup whole-milk ricotta cheese

fruit, powdered sugar, maple syrup, yogurt, for serving (all optional)

DIRECTIONS

1. Place butter and milk in a small saucepan over medium heat. Cook until butter is melted, stirring occasionally. Remove from the heat and let cool slightly.

2. In a medium bowl, whisk together the flour, baking powder, and salt.

3. In a large bowl, whisk together the egg yolks, sugar, lemon zest, and vanilla. Slowly whisk in a small amount of the milk-egg mixture to temper the eggs before whisking in the remaining milk-egg mixture until smooth. Stir in the flour mixture with a rubber spatula until just combined (do not overmix) and set aside.

4. In a separate bowl, whisk the egg whites to soft peaks (the peaks should bend easily, I like to use a hand held mixer for this). Using a rubber spatula, gently fold the egg whites into the batter until just combined.

5. Gently fold the ricotta into the batter, being careful not to break down the texture of the cheese. (The batter will still be lumpy and streaked with bits of ricotta.)

6. Heat a large nonstick fry pan, griddle, or cast-iron skillet over medium heat. (You can test to make sure the pan is hot by sprinkles a couple drops of cold water into the pan. If it sizzles and dances across the surface then the pan is ready.)

7. Lightly coat the surface of the pan with butter then use a 1/2-cup measuring cup to scoop the batter onto the pan. (Don’t try to crowd too many pancakes onto one pan. They will spread as they cook and need room to flip.) Cook until bubbles form on top of the pancakes, about 4-5 minutes. Flip and cook until the bottoms are golden brown, another couple minutes. Repeat with the remaining batter and serve with fruit, powdered sugar, maple syrup, or yogurt (all optional). (Note: cooked pancakes can be kept warm on a sheet tray in a 250 F oven until ready to serve.)

Makes 12-16 pancakes.

(Adapted from CHOW )