Category Archives: Cookies

Chocolate Chip, Butterscotch, and Walnut Cookie Bars

December 26, 2012

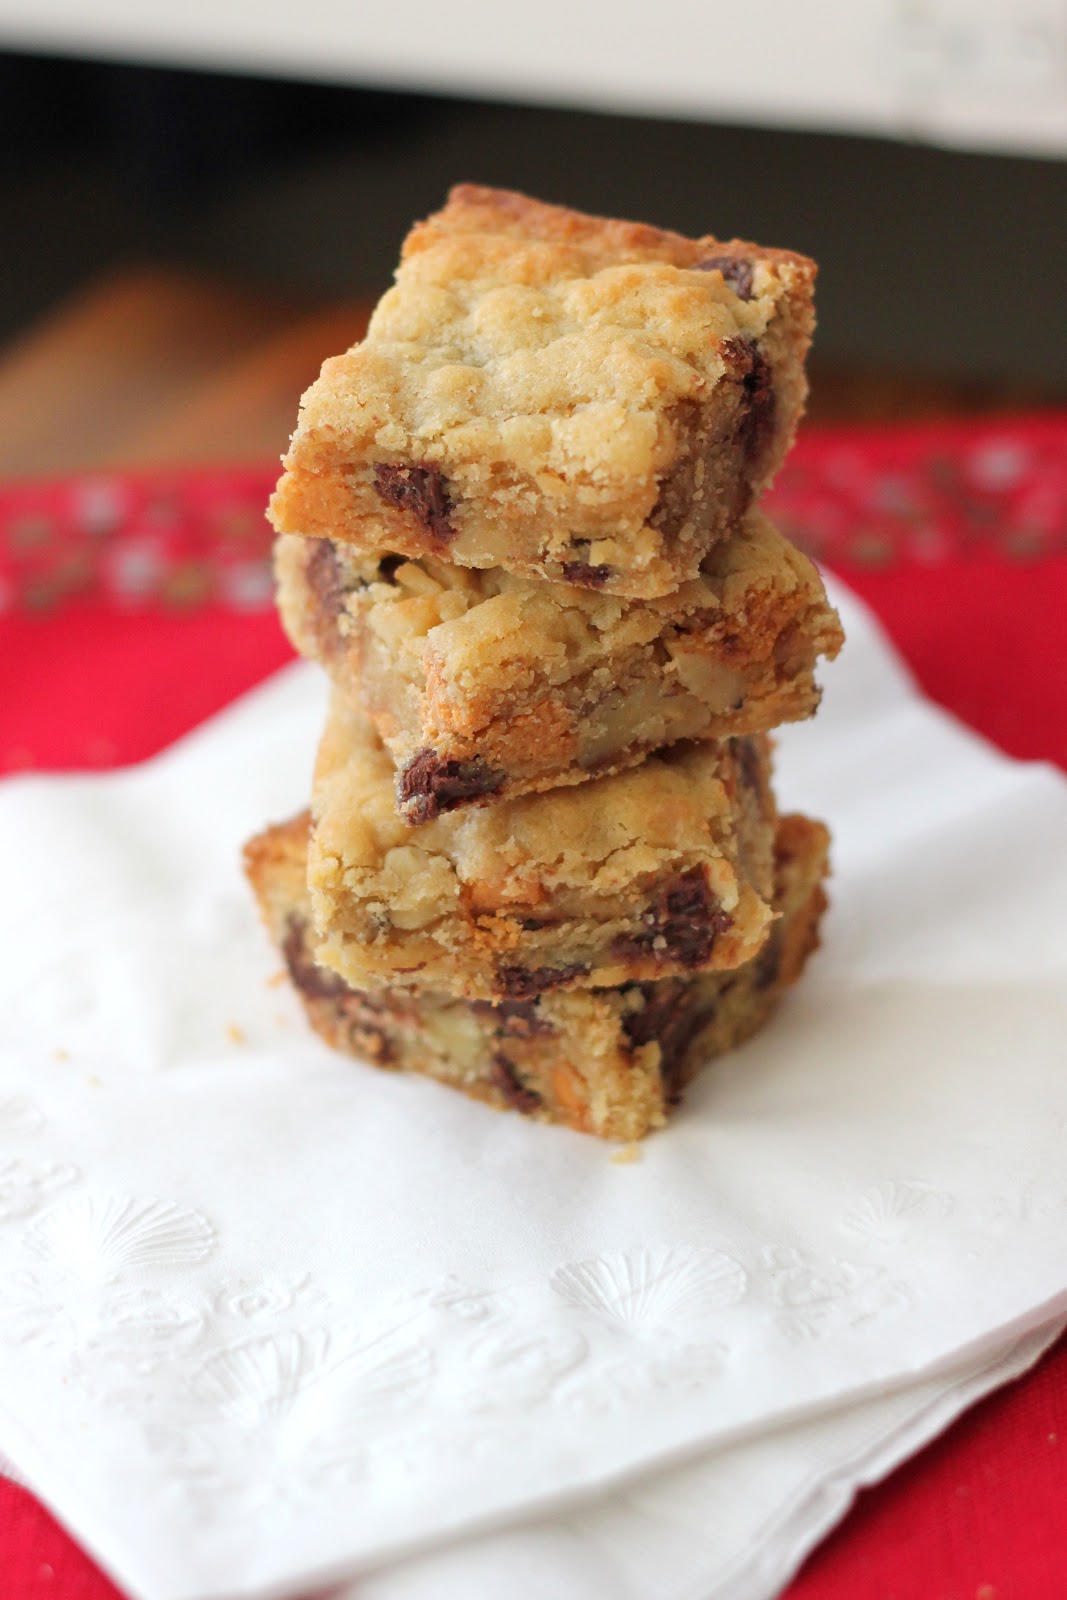
This recipe isn’t much different than our favorite chocolate chip cookies. But it’s baked in bar form, which results in a giant soft/gooey cookie than can be cut into bite-size bars for sharing (or not). And it’s stuffed with walnuts and butterscotch chips in addition to the chocolate. There’s something about those butterscotch morsels that I can’t resist. While I thought they were perfect as written, you could use almonds or cashews in place of the walnuts. And then there are endless options with dark chocolate and white chocolate and peanut butter, etc. chips. However you make them, they’re likely to disappear fast.

Chocolate Chip, Butterscotch, and Walnut Cookie Bars

INGREDIENTS

2 1/4 cups all-purpose flour
2 tsp. baking powder
1 tsp. sea salt
1 cup (2 sticks) unsalted butter, room temperature
3/4 cup sugar
3/4 cup brown sugar (I used dark brown)
1 tsp. pure vanilla extract
2 large eggs
1 cup chocolate chips
1 cup butterscotch chips
1 cup walnuts, chopped (toast for even more flavor)

DIRECTIONS

1. Preheat oven to 350 F. Lightly grease a 9×13 baking dish.

2. With an electric mixer on medium, cream butter, sugar, and vanilla extract until smooth. Add the eggs, one at a time, mixing well after each addition.

3. In a separate bowl, whisk to combine the flour, baking powder, and salt. With the mixer running on low, gradually add the dry ingredients and mix until well combined. Stir in the chocolate chips, butterscotch chips, and walnuts by hand.

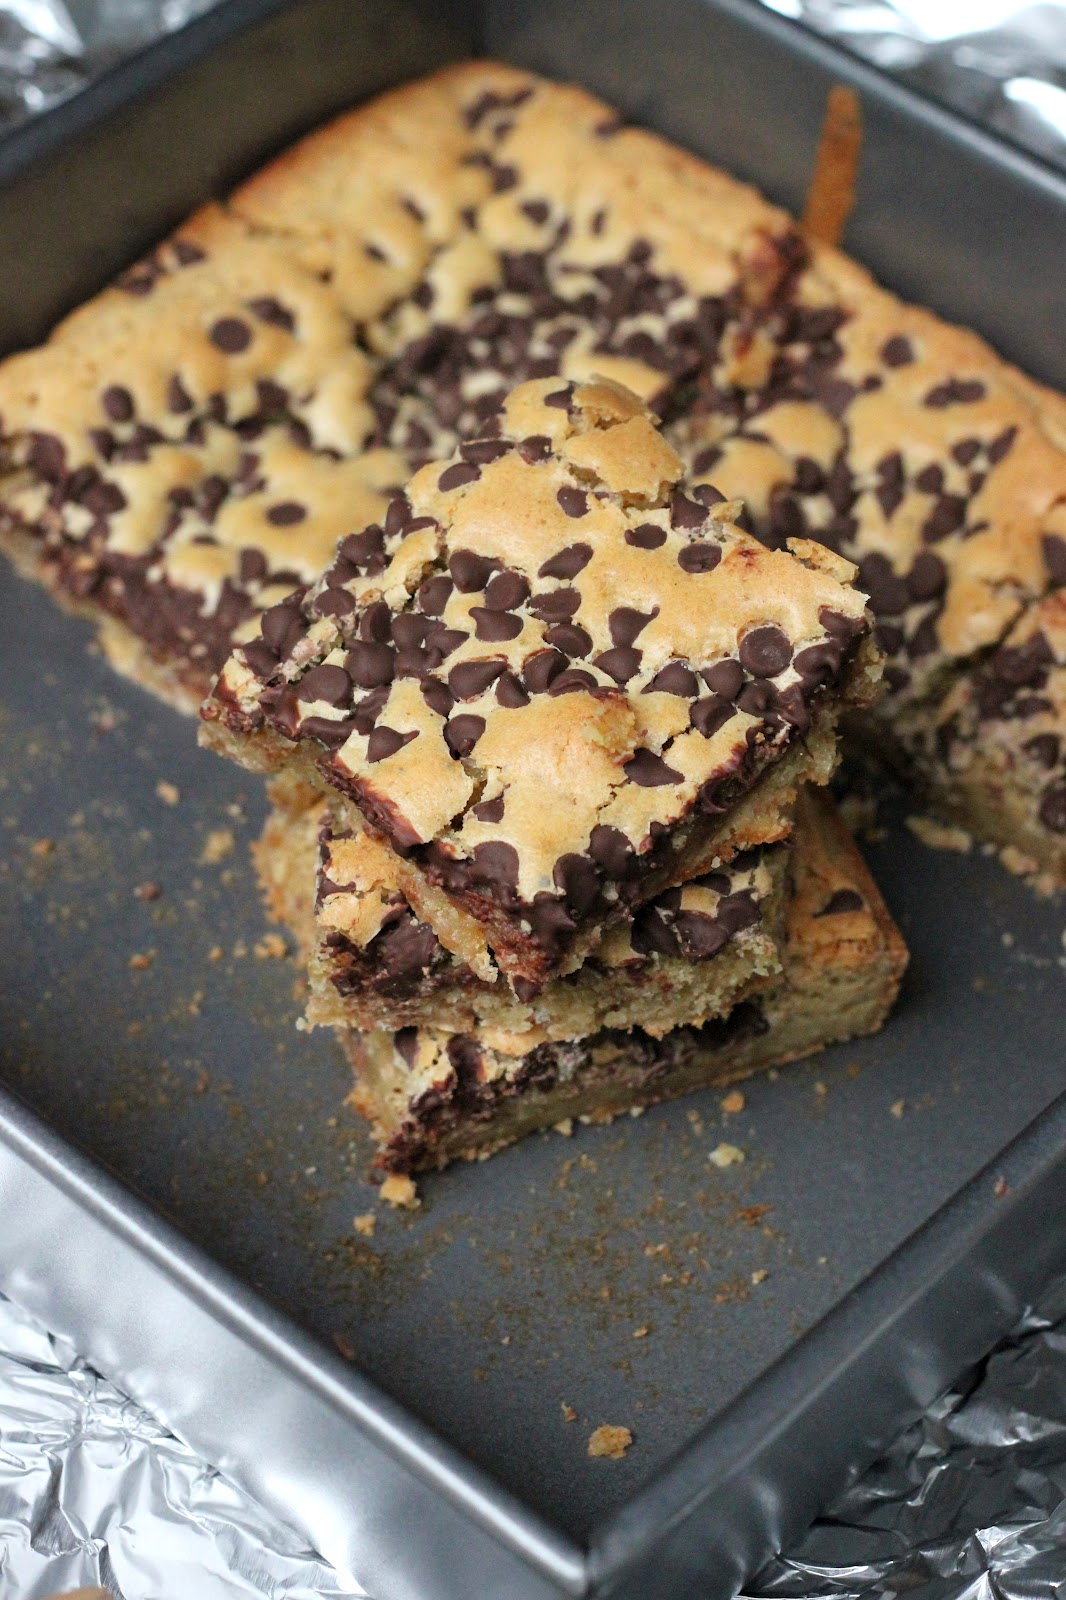
4. Drop dough into the prepared baking dish and spread with a spatula until even. Bake in preheated oven for about 18 minutes, until the edges and top are golden brown. Cool on a wire rack before cutting into bars and serving.

Fills a 9×13 pan.

(Adapted from Passports and Pancakes)

Chocolate Coconut Bars

September 20, 2012

There aren’t a lot of dessert options when you’re eating dairy-free. Desserts that don’t include any milk, butter, buttermilk, yogurt, cream, cream cheese, etc. are not only hard to come by, but usually not too enticing. I know dairy-free margarine and several other substitutes exist. (I’ve got some and I’ll try them out eventually.) They just don’t excite me. Thankfully, not all chocolate is made with milk (especially the dark varieties). And coconut oil makes an excellent replacement for butter in some recipes.

I just discovered coconut oil and I love it. And from what I hear/read- it happens to be good for you. I’ll eat it for breakfast spread on a toasted english muffin. Yum. Anyway, its health benefits are probably negated by the copious amounts of sugar used in this recipe. But this is after all, dessert. Feel free to use butter instead. I’m sure (in fact, I know) that would be good. But the oil adds even more coconut flavor without sacrificing richness or texture in this recipe.

Chocolate Coconut Bars

INGREDIENTS

1 cup all-purpose flour
1/8 tsp. salt
1/2 cup unsalted butter, melted and at room temperature (I used 1/2 cup coconut oil)
1 cup light brown sugar
1 large egg
1 1/2 tsp. pure vanilla extract
1 cup sweetened coconut flakes + extra for sprinkling on top
1 cup chocolate chips

DIRECTIONS

1. Preheat oven to 350 F. Spray an 8-inch square baking pan with cooking spray.

2. Combine the flour and salt; whisk and set aside.

3. Stir together the melted butter (or coconut oil) and brown sugar until smooth and creamy; beat in egg and vanilla extract until well blended.

4. Slowly beat in the flour and salt mixture until just blended. Next, stir in the coconut and chocolate chips. Scrape the batter into the pan. Make sure the batter is spread evenly, smooth with a spatula. Sprinkle extra coconut on top of the bars.

5. Bake for about 20-25 minutes, or until set in the center but still soft. (Mine were almost overly done after 18 minutes- this may be due to my hot oven or replacing the butter with coconut oil.) Do not overbake the bars. Let cool slightly before cutting the bars into squares and serving.

Makes an 8×8 pan.

(Adapted from Brown Eyed Baker via Lahatchita Eats)

Browned Butter Blondies

April 23, 2012

I’m sorry about all the sweets. I have the best of intentions to make some healthy savory dishes to share with you this week. (My last before baby girl is scheduled to arrive May 1st!) I’ve made plans to spend my dwindling moments of pregnancy shopping, napping, reading, movie-watching, cooking, and sneaking in a few more dates with just the two of us. All the things I’ll miss once parenthood sets in. Although I won’t complain if having a baby means more evenings in like last night- curled up on the futon with Netflix reruns and bowls of warm blondies and ice cream.

These were made on a last-minute whim and they exceeded expectations. Browning butter adds something marvelous to an otherwise ordinary recipe. I wanted to add some walnuts as well. Dustin wouldn’t let me. (But you should. I think it would be awesome.) The key to perfect blondies is leaving them every-so-slightly gooey in the center. And serving them right out of the oven, topped with melting ice cream.

Browned Butter Blondies

INGREDIENTS

6 Tbsp. unsalted butter
1 1/2 cups brown sugar
2 eggs
1 1/8 cups flour
1 tsp. baking powder
1/2 tsp. salt
1 tsp. pure vanilla extract
1/2 cup chocolate chips (I used mini semi-sweets)

DIRECTIONS

1. To brown butter, melt butter in a saucepan over medium heat. Cook, stirring frequently, until foam subsides and small brown flecks start to appear in the bottom of the pan. Once it has reached a nice brown color and nutty aroma, remove from the heat.

2. Preheat oven to 350 F. Lightly grease an 8×8 pan.

3. In a medium bowl, whisk to combine browned butter, sugar, and eggs until well mixed. Stir in the dry ingredients. Pour into the prepared baking dish and sprinkle with chocolate chips.

4. Bake in preheated oven for about 20 minutes, until the edges and top are just set and turning golden brown (don’t over bake- you want them slightly gooey in the center). Serve warm with a scoop of ice cream.

Makes an 8×8 pan.

(Adapted from The Little Red House)

Red Velvet Whoopie Pies with Cream Cheese Frosting

January 3, 2012

I’m back! With a recipe, finally! And hopefully there will be more to come over the next few months before baby girl arrives. I was in the mood to make something sweet to celebrate the New Year and found this recipe of Paula Deen’s. Red velvet has always intrigued me, so I decided to attempt an easy version of the classic cake in the form of a cookie (or actually whoopie pie). While the shape might be unusual, this recipe includes all of the traditional elements of red velvet- cocoa powder, buttermilk, and mounds of cream cheese frosting. My only complaint is that this recipe makes a bit too much frosting, if there is such a thing. I’m sure you’ll find a use for the excess though. Or just start by halving that part of the recipe and see how it goes. I thought these were delicious- the cake is soft and chewy, the filling is rich and creamy, and the toasted pecans added the perfect bit of crunch.

Red Velvet Whoopie Pies with Cream Cheese Frosting

INGREDIENTS

Red Velvet Whoopie Pies:
1 1/3 cups all-purpose flour
2 Tbsp. cocoa powder
1 tsp. baking powder
1/4 tsp. baking soda
1/2 tsp. salt
1/4 cup butter, room temperature
1 cup sugar
2 eggs
2 Tbsp. buttermilk
2 Tbsp. apple cider vinegar
1 tsp. vanilla extract
1 Tbsp. red food coloring

Cream Cheese Frosting:
16 oz. cream cheese, room temperature
1 cup (2 sticks) butter, room temperature
1 tsp. vanilla extract
4 cups powdered sugar
3/4 cup toasted pecans, finely chopped (optional)

DIRECTIONS

1. Preheat oven to 375 F. Line a large baking sheet with parchment paper.

2. In a small bowl, mix together the flour, cocoa powder, baking powder, baking soda, and salt. In a large bowl, cream the butter and sugar until light and fluffy, about 3 minutes. Add the eggs 1 at a time. Then beat in the buttermilk, vinegar, vanilla, and red food coloring. Once combined, add the dry ingredients to the wet and mix until thoroughly combined.

3. Drop batter into rounded mounds on the prepared baking sheet using a small ice cream/cookie scoop or a tablespoon. Bake in preheated oven for about 10 minutes, until set. (The cookies should be cake-like and light.) Remove cookies from the pan to a wire rack to cool completely.

4. To make the cream cheese frosting, in a large mixing bowl, beat the cream cheese, butter, and vanilla together until smooth. Add the sugar and on low speed, beat until incorporated. Increase the speed to high and mix until light and fluffy. Spread the frosting between two cooled cookies and roll the edges in pecans, if desired.

Makes 16-20 sandwich cookies.

(Recipe from Food Network)

Snickerdoodles

September 10, 2011

How I love cinnamon. Cinnamon rolls, cinnamon swirl loaves, cinnamon-spiced cakes, even ice cream. I can always count on cinnamon to bring me to a happy place. When I need a quick cinnamon fix I turn to snickerdoodles- the classic cinnamon ‘n sugar dusted cookies. You’ll be able to taste these cookies long before you bite into them. The smells of butter and sugar and cinnamon permeating every part of your kitchen (or entire house if its small like ours). If the aroma is too much to resist you can always freeze the remainder of the batch. That way they might last a little bit longer.

7/28/09: When I started typing out this recipe one ingredient in particular caught my eye. Baking soda? I don’t remember using any baking soda. In fact, I remember reaching for my trusty tin of baking powder, and dumping in two whole teaspoonfuls. So I double checked the recipe. Yep, baking soda. Every single snickerdoodle recipe in the world calls for baking soda, NOT baking powder (I checked most of them).

So I was a little scatterbrained that night. I must have been on painkillers- or something. There has to be an excuse. But now I recall that on Sunday when I was making Blueberry Crumb bars (coming soon) I used the wrong measuring cup, dumping in 1/3 cup sugar instead of 1/4. Well nobody is going to complain about that. Those turned out delish.

Luckily, neither mistake was fatal. These snickerdoodles were a tad bit on the airy side. Soft, like biting into a cinnamon-sugar dusted pillow. I’m almost embarrassed to admit, this was only my second experience with snickerdoodles. I was introduced to them last week, and have ever since been lamenting the fact that my childhood was devoid of their presence. It should be a crime.

So this is the way they should be made. With baking soda. Next time I’ll get it right.

Snickerdoodles

INGREDIENTS

1 cup butter
1 1/2 cups white sugar
2 eggs
1 tsp. vanilla extract
2 3/4 cup all purpose flour
2 tsp. cream of tartar
1 tsp. baking soda
1/4 tsp. salt
1/4 cup white sugar
2 tsp. cinnamon

DIRECTIONS

1. Preheat oven to 400 F.

2. Cream butter and sugar. Add the eggs and vanilla and cream until light and fluffy.

3.. In a separate bowl combine the flour, cream of tartar, baking soda, and salt. Blend the dry ingredients into the wet, mixing by hand.

4. In a small bowl, mix together the 1/4 cup sugar and cinnamon. Shape the dough into small balls and roll them in the cinnamon-sugar to coat. Place 2 inches apart on an UNgreased cookie sheet.

5. Bake in preheated oven for 6-10 minutes (depending on size) until the tops are set and the bottoms are beginning to brown. Remove from the cookie sheet and cool on a wire rack.

Makes 3-4 dozen cookies.

(Adapted from All Recipes)