Honey Cashew Chicken with Vegetables and Rice

December 10, 2020

I love this easy honey cashew chicken stir fry! It’s packed with veggies and has a tangy sweet sauce that you’ll want to scrape every last bit of from the pan to pour over rice. As for the kids- one really liked the chicken, one devoured her broccoli first, and the smallest one preferred the cashews and rice. But there’s something here for everyone!

Honey Cashew Chicken with Vegetables and Rice

INGREDIENTS

1 lb. boneless skinless chicken breast, cut into 1-inch cubes
2 Tbsp. cornstarch
1/2 tsp. salt
1/2 tsp. freshly ground black pepper
1 Tbsp. canola oil
1 Tbsp. sesame oil
2 cups broccoli florets (I lightly steam mine first so it’s not too crisp)
1 cup frozen shelled edamame (I used another cup of broccoli instead)
2 cloves garlic, minced
1/2 yellow onion, finely chopped
1 red bell pepper, sliced
1/2 cup dry-roasted cashews, unsalted (or use salted and decrease the salt in the recipe slightly)
1 Tbsp. rice vinegar
2 1/2 Tbsp. honey
2 Tbsp. low-sodium soy sauce
up to 1 Tbsp. Sriracha or another hot chile pasta (I used 1 tsp. Sambal Oelek for a medium kick, use 1/2 tsp. for mild)

steamed jasmine rice, for serving
green onions, sliced for serving (optional)

DIRECTIONS

  1. Combine chicken, cornstarch, and salt and pepper in a bowl; toss to coat.
  2. Heat a large skillet over medium-high heat. Add canola and sesame oils. Add chicken mixture, and sauté until just cooked through. Remove chicken from the skillet to a plate. Increase heat to high, and add broccoli and the next 4 ingredients (through red bell pepper). Cook 5 minutes or until vegetables are crisp-tender, stirring frequently. Stir in cashews and cooked chicken.
  3. Combine vinegar and remaining ingredients in a small bowl; stir with a whisk. Add vinegar mixture to chicken mixture; toss to coat. Bring to simmer and cook several minutes until sauce thickens. Sprinkle with green onions (optional) and serve with rice.

Serves 3 – 4.

(Adapted from Cooking Light)

Classic Turkey Stuffing

December 8, 2020

We had Thanksgiving dinner alone this year (thank you, COVID) and it’s the first time we’ve ever prepared an entire Thanksgiving meal all on our own! We smoked a (much-too-large for our little family of 5) turkey on the Traeger which was a bit stressful on our first try but still turned out delicious. Of course there were mashed potatoes and gravy, cranberry sauce, and rolls (I tried a new roll recipe that didn’t blow us away). I simply roasted the green beans and made this sweet potato casserole my kids go nuts over (because it’s practically dessert). And today I’m sharing the recipe I’ve learned from my mama and always use to make stuffing.

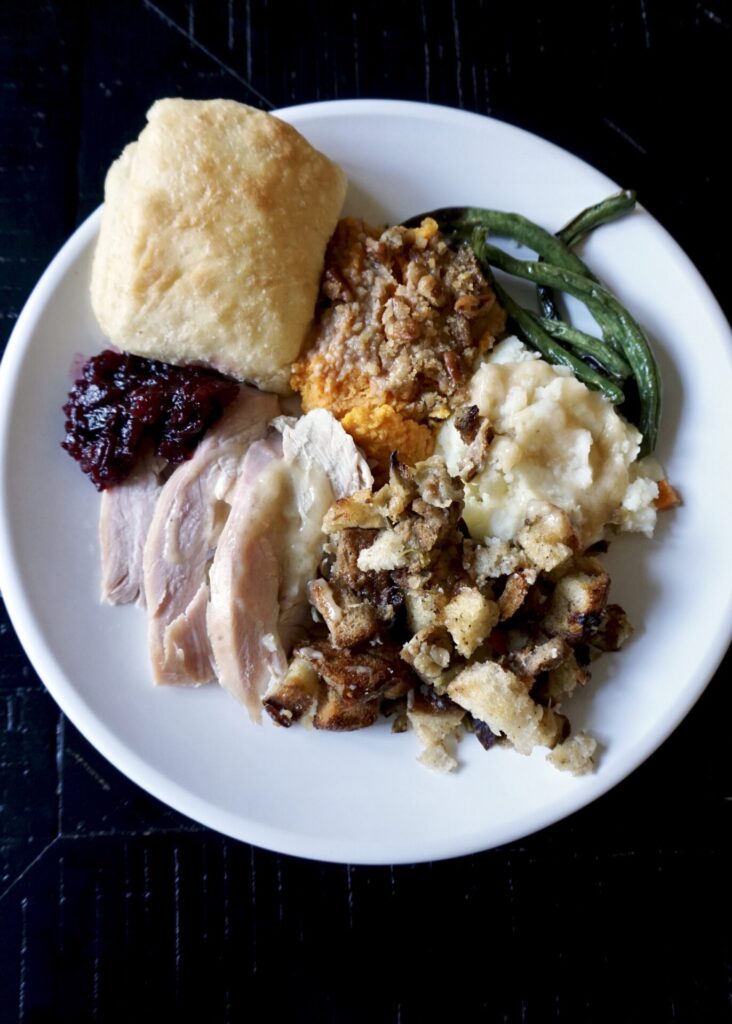
This is a classic turkey stuffing recipe, that closely resembles a Betty Crocker recipe so I’m pretty sure that’s where my mom got it. I don’t actually stuff the bird but rather bake the stuffing in a dish and if you use a bit of turkey stock (don’t throw away the turkey neck and giblets and make your own it’s so easy and worth it!), it tastes just as good. Plus, you can control how moist it stays/crisp it gets and know that it’s completely cooked through! I also love how adaptable this recipe is (use your favorite mixture of breads, add more/less veggies, and you can adjust the seasonings to taste). My kids were suspicious of this stuffing when it appeared on their plates but were fighting over the leftovers. It’s so good!

Classic Turkey Stuffing

INGREDIENTS

Stuffing:
~12 cups dried bread cubes (I used a mixture of crusty white bread and whole wheat sandwich bread and dried them out in the oven at 350 F for about 10 min)
1/2 cup (1 stick) butter
1 large onion, diced
2 large carrot, peeled and diced
2-3 stalks celery, diced
~1 tsp. kosher salt 
~ 1/2 tsp. freshly ground black pepper
1 tsp. poultry seasoning* (or more to taste)
turkey or chicken stock, to moisten (I used turkey stock made with the turkey neck and giblets)

*Poultry Seasoning:
1/2 tsp. ground sage
3/4 tsp. ground thyme
1/2 tsp. ground marjoram (mine was not ground so I crushed it a bit)
1/4 tsp. ground rosemary (mine was not ground so I crushed it a bit) 
1/4 tsp. nutmeg
1/4 tsp. freshly ground black pepper

DIRECTIONS

  1. To make the poultry seasoning, stir to combine the sage, thyme, marjoram, rosemary, nutmeg, and black pepper in a small bowl.
  2. To prepare the stuffing, melt the butter in a large saute pan over medium heat. Add the onion, carrots, and celery and cook for about 10 minutes until the vegetables are tender. Stir in the salt and pepper and poultry seasoning. 
  3. Place the bread cubes in a large bowl, pour the onion mixture over top and toss to combine. Adjust salt and pepper and poultry seasoning to taste. At this point the stuffing can be refrigerated until ready to use.
  4. The stuffing can be cooked inside of a turkey, but I bake it separately in the oven. Grease or butter a 9×13 baking dish. Spread the stuffing in the dish and pour some turkey/chicken stock over top, mixing it in lightly with a fork. How much you’ll use depends on how moist you want the stuffing. I use quite a bit for flavor and so it can bake for a while alongside the other side dishes. 
  5. Preheat oven to 400 F (or whatever temperature your other dishes are baking at will be fine!). Bake for 30-60 minutes (depending on how moist/crisp you want it and what else is baking alongside it) until crisp on the edges but still moist in the middle. 

Makes enough to fill a 9×13 baking dish.

(Adapted from my mom and Betty Crocker, poultry seasoning from Food)

Pear Crumble Pie

December 4, 2020

I’m so excited to be finally sharing this recipe with you! For the last 3+ years this Pear Crumble Pie has become our favorite pie ever/Thanksgiving dessert tradition. Since I only make it once a year and am often traveling for the holiday and baking it in someone else’s kitchen, it has taken me this long to take a picture and share it. But I have already passed the recipe on to a few friends who love it too. It’s a keeper! And since pears are in season much of the winter, it would also make an excellent Christmas/New Years treat!

Pear pie might sound weird, since apples are more commonly used. But I promise, once you try this combo of sweet Bartlett pears with tossed with cinnamon and vanilla in a flaky all-butter pie crust and topped with cookie crumble, you won’t go back to apple pie!

You might notice that the left half of the pie above has oats in the crumb topping and the right half does not. I figured out several years ago that I can’t digest oatmeal without side effects (which I’ll spare you the details on). So I’ve adapted this recipe to be made with and without the oats and it’s great either way. Though I do love the heartiness the oatmeal provides to the crumble, and recommend using it if you can!

Lastly, please make your own pie crust. It’s really not hard. And it tastes so SO much better than store bought. This is my favorite pie crust recipe. It’s buttery and flaky and perfect. (And can easily be doubled when you want to use it in a recipe that calls for a top and bottom pie crust!)

Pear Crumble Pie

INGREDIENTS

Pie Crust:
1 1/4 cups all-purpose flour
1/2 Tbsp. sugar
1/4 tsp. sea salt
1/2 cup (1 stick) cold unsalted butter, cubed
3-4 Tbsp. ice water
1 egg white, lightly beaten

Filling:
5 large Bartlett pears (about 2 lbs.), peeled, cored and thinly sliced (use pears that are ripe but still firm- not too squishy yet- so they don’t get mushy once baked)
1/4 cup all-purpose flour
1/2 tsp. sea salt
1/2 cup sugar
1 tsp. ground cinnamon
1/2 a vanilla bean, seeds scraped out (or 1 tsp. pure vanilla extract)

Crumble:
1/2 cup all-purpose flour
1/2 cup rolled oats (or replace with another 1/2 cup of all-purpose flour)
1 cup brown sugar
1/2 cup (1 stick) unsalted butter, room temperature

DIRECTIONS

  1. To make the pie crust, mix the flour, sugar, and salt in a food processor (or by hand with a whisk). Add the butter and pulse until coarse mill forms (or cut in the butter by hand with a pastry blender until only pea-size crumbs remain). Gradually blend in enough ice water until the dough clumps (or mix in a Tbsp. at a time by hand). Form the dough into a large ball and flatten into a disk. Wrap in plastic and chill 2 hours or overnight.
  2. Roll out the pastry dough on a floured surface until large enough to cover a 9-inch pie dish. Drape the rolled out pastry over the pie dish and press it down to fit. Trim and crimp the edges. Brush the bottom and sides of the crust with the beaten egg white. 
  3. To make the filling, in a large bowl add the vanilla seeds/extract, pears, flour, salt, sugar and cinnamon. Use your hands or a spoon to carefully combine the ingredients together, making sure the pears don’t break apart. Set aside.
  4. To make the crumble, in a small bowl, combine the flour, oats (if using), brown sugar and butter. Using a pastry cutter/fork (or your fingers), combine the mixture until it resembles large crumbs.
  5. Spoon the filling into the pie crust. Top with the crumble mixture.
  6. Preheat oven to 325 F. (If you are worried about your filling spilling over, you can place the pie pan on top of a large rimmed baking sheet to catch any dripping while it bakes. I used a deep dish pie pan and didn’t need to.)
  7. Cover the exposed pie crust with thin strips of aluminum foil or a pie shield and bake in preheated oven for 35 minutes. Remove foil/shield and bake for another 25 minutes until the filling is bubbling and the top is golden and crisp. Let cool for at least an hour before serving. Slice and serve with vanilla ice cream or whipped cream. 

Makes 1 pie.

(Adapted from Bitchin Camaro)

Farm Salad with Roasted Carrots, Feta, and Herb Vinaigrette

December 2, 2020

I’m on a roll with my restaurant inspired recipes lately… after replicating my favorite sandwich and focaccia from my favorite DERU market here in Seattle, I decided I should recreate their famous Farm Salad. It consists of fresh mixed greens, roasted carrots (or sometimes in the winter they replace the carrots with roasted butternut or delicata squash), crumbled feta, toasted pepitas, fresh chopped herbs like dill, parsley, and chives, and a lemony herb vinaigrette. I usually order it alongside my sandwich but when I have it on it’s own I add shredded roasted chicken to make it a meal. Around the holidays I’ve also seen them add pomegranate arils for a festive sweet crunch.

While you’re roasting the carrots you can whisk up the vinaigrette and prep the rest of the salad ingredients. Toss the warm carrots on top (or they can be served room temperature which is just as delicious), drizzle with dressing, toss and dig in. I promise this is a salad you’ll remember!

Farm Salad with Roasted Carrots, Feta, and Herb Vinaigrette

INGREDIENTS

1 lb. carrots, peeled and sliced into thin rounds
extra virgin olive oil
salt and freshly ground black pepper
mixed leafy greens
toasted pumpkin seeds/pepitas (I used salted)
Valbreso feta cheese, crumbled (I highly recommend using this mild and creamy French feta as Greek feta is much stronger and will have a more dominant flavor)
rotisserie chicken (light and dark meat), shredded
fresh dill, chopped
fresh flat-leaf parsley, chopped
fresh cilantro, chopped (optional)
fresh chives, chopped
pomegranate seeds (optional)

Herb Vinaigrette:
3 Tbsp. freshly squeezed lemon juice + pinch freshly grated lemon zest
1 Tbsp. white wine vinegar
4 tsp. honey
1 tsp. Dijon mustard
1/2 tsp. grated garlic
2 Tbsp. finely chopped fresh dill
2 Tbsp. finely chopped fresh flat-leaf parsley
2 Tbsp. finely chopped fresh cilantro and/or fresh chives (I used both)
1/2 cup extra virgin olive oil
salt and freshly ground black pepper, to taste

DIRECTIONS

  1. Preheat oven to 400 F. Line a large rimmed baking sheet with aluminum foil and lightly coat with nonstick cooking spray. Place the sliced carrots on the baking sheet and drizzle with 1-2 Tbsp. olive oil, sprinkle with kosher salt and freshly ground black pepper, and toss to coat. Spread the out carrots in a single layer on the baking sheet and roast in preheated oven for about 20 minutes, until tender and browned.
  2. To make the vinaigrette, combine the lemon juice/juice, vinegar, honey, mustard, and fresh herbs in a medium bowl and whisk to combine. While whisking constantly, stream in the olive oil. Season to taste with salt and freshly ground black pepper.
  3. To assemble the salad, place mixed greens in a serving bowl. Top with roasted carrots, pumpkin seeds, feta, and chicken. Garnish with a few fresh herbs and pomegranate seeds (if using). Drizzle with lemon herb vinaigrette (this recipe makes a lot of dressing so you’ll have some leftover), toss, and serve.

(Adapted from So Fresh N So Green)

Easy (Yet Amazing!) No-Knead Focaccia

November 30, 2020

When I posted this sandwich I told you I’ve been meaning to bake my own focaccia. And I finally went for it! I read a lot of recipes to find one that wasn’t too fussy (i.e. didn’t require two days to proof) and had great reviews. What I didn’t expect is that first try it would turn out so perfect! Actually comparable to the focaccia I obsess over at my favorite restaurants/bakeries. And the best part… it’s really not hard!

Focaccia is extra delicious because it contains a lot of oil. The oil ensures the bread is rich in flavor and that you get a crispy crust (while the center stays soft and chewy). I kept things simple this time and just topped it with flakey sea salt. But the options are endless… garlic, onion, fresh or dried herbs, tomatoes, cheese. We devoured more than half of this loaf shortly after it came out of the oven. Leftovers I hid in the freezer and made for some awesome sandwiches a few days later.

Note: Bon Appetit has some helpful photos/video of the baking process (turning the dough, dimpling the loaf, etc.) so you can follow this link to see those.

Easy (Yet Amazing!) No-Knead Focaccia

INGREDIENTS

1/4 -oz. envelope active dry yeast (~2 1/4 tsp.)
2 tsp. honey
5 cups all-purpose flour
5 tsp. Diamond Crystal or 1 Tbsp. Morton Kosher salt (I used kosher salt)
6 Tbsp. extra virgin olive oil, divided + extra for hands
flakey sea salt, for topping (I used Maldon)

DIRECTIONS

  1. Whisk one ¼-oz. envelope active dry yeast (about 2¼ tsp.), 2 tsp. honey, and 2½ cups lukewarm water in a medium bowl and let sit 5 minutes (it should foam or at least get creamy; if it doesn’t your yeast is dead and you should start again—check the expiration date!).
  2. Add 5 cups all-purpose flour and 5 tsp. Diamond Crystal or 1 Tbsp. Morton kosher salt and mix with a rubber spatula until a shaggy dough forms and no dry streaks remain.
  3. Pour 4 Tbsp. extra-virgin olive oil into a big bowl that will fit in your refrigerator. This puppy is going to rise! Transfer dough to bowl and turn to coat in oil. Cover with a silicone lid or plastic wrap and chill until dough is doubled in size (it should look very bubbly and alive), at least 8 hours and up to 1 day. If you’re in a rush, you can also let it rise at room temperature until doubled in size, 3–4 hours. (Mine rose for 4 hours at room temperature.)
  4. Generously butter (I used nonstick cooking spray) a 9×13 baking pan, for thicker focaccia that’s perfect for sandwiches, or an 13×18 rimmed baking sheet, for focaccia that’s thinner, crispier, and great for snacking. The butter may seem superfluous, but it’ll ensure that your focaccia doesn’t stick. Pour 1 Tbsp. extra-virgin olive oil into center of pan. Keeping the dough in the bowl and using a fork in each hand, gather up edges of dough farthest from you and lift up and over into center of bowl. Give the bowl a quarter turn and repeat process. Do this 2 more times; you want to deflate dough while you form it into a rough ball. Transfer dough to prepared pan. Pour any oil left in bowl over and turn dough to coat it in oil. Let rise, uncovered, in a dry, warm spot (like near a radiator or on top of the fridge or a preheating oven) until doubled in size, at least 1½ hours and up to 4 hours. (I let mine rise for another 3 hours.)
  5. Place a rack in middle of oven; preheat to 450 F. To see if the dough is ready, poke it with your finger. It should spring back slowly, leaving a small visible indentation. If it springs back quickly, the dough isn’t ready. (If at this point the dough is ready to bake but you aren’t, you can chill it up to 1 hour.) Lightly oil your hands. If using a rimmed baking sheet, gently stretch out dough to fill (you probably won’t need to do this if using a baking pan). Dimple focaccia all over with your fingers, like you’re aggressively playing the piano, creating very deep depressions in the dough (reach your fingers all the way to the bottom of the pan). Drizzle with remaining 1 Tbsp. extra-virgin olive oil and sprinkle with flaky sea salt.
  6. Bake focaccia until puffed and golden brown all over, 20–30 minutes. (Mine took about 25 minutes.) Cool on a wire rack, slice, and serve.

Makes a 9×13 or 13×18 pan foccacia.

(Adapted from Bon Appetit)