Category Archives: Dessert

Dahlia Bakery’s Cherry Almond Scones

February 20, 2021

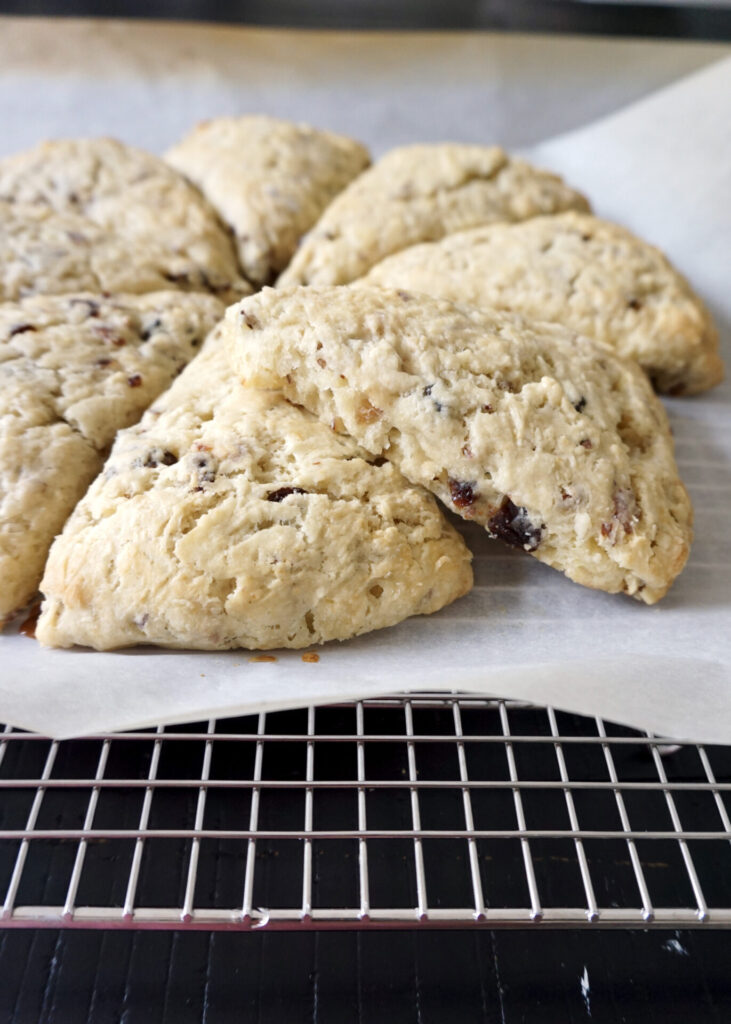
Like the Tomato Soup with Brown Butter Croutons, this recipe come’s from Seattle’s Dahlia Bakery, one of my favorite places to eat downtown. They’ve been closed during the pandemic and it has been more motivation for me to try their recipes at home! I made these scones for brunch last weekend, with soft scrambled eggs, chicken sausages, and green smoothies on the side, and my kids oohed and aahed over them! They’re not overly sweet but plenty buttery. And quite addictive with a crackly sugar top, bits of tart dried cherry, and crunchy almond flakes. I added lemon zest as directed but think they’d be just as, maybe more, delicious with orange zest!

Dahlia Bakery’s Cherry Almond Scones

INGREDIENTS

2 1/2 cups all-purpose flour
1/4 cup sugar + extra for sprinkling
1 tsp. baking powder
1 tsp. grated lemon zest (or orange zest)
3/4 tsp. kosher salt
1/4 tsp. baking soda
10 Tbsp. cold unsalted butter, cut into small cubes
1/2 cup dried tart cherries, coarsely chopped (I used Trader Joe’s brand)
1/2 cup sliced blanched almonds, toasted and cooled (mine weren’t blanched and it was fine)
1 cup buttermilk
1/4 tsp. pure vanilla extract
1/4 tsp. pure almond extract
1/4 cup heavy cream, for brushing (I used whole milk in a pinch)

DIRECTIONS

  1. Preheat oven to 425 F.
  2. In a small pan, toast almonds over medium heat about 5 minutes, stirring occasionally. Remove from heat. Let cool completely.
  3. In a large bowl, combine flour, sugar, baking powder, lemon zest, salt, and baking soda. Cut the butter into the dry mixture, using a pastry blender or your fingertips until the mixture looks like coarse cornmeal. Mix in the cherries and almonds.
  4. Add buttermilk and extracts. Using rubber spatula, mix until dough just comes together.
  5. Turn dough onto lightly floured surface and knead lightly and quickly with hands until buttermilk is evenly incorporated into dry ingredients, being careful not to overwork the dough. Pat dough with your hands into a 9-inch round about 1-inch thick. Cut the dough into 8 wedges with a floured knife or metal bench knife.
  6. Place the scones on a parchment-lined baking sheet. Brush them with the heavy cream and sprinkle them generously with sugar.
  7. Bake in preheated oven for 10 minutes, rotate the baking pan, then reduce the oven temperature to 350 F and finish baking until golden brown and cooked through, about 15 minutes more. Remove from oven and cool briefly on a wire rack. Serve the scones while they are still warm.

Makes 8 scones.

(Adapted from The Dahlia Bakery Cookbook: Sweetness in Seattle and Luci’s Morsels)

Coconut Brown Butter Cookies

February 5, 2021

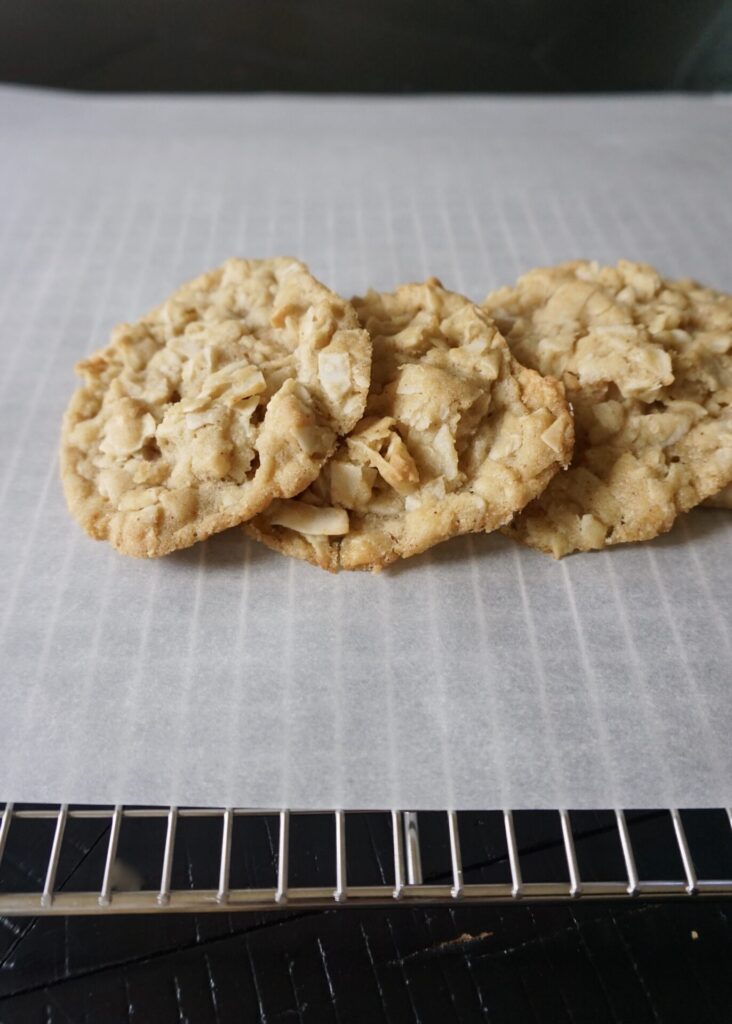
Are you sick of brown butter yet? Obviously, I’m not. After making brown butter chocolate chip cookies and brown butter apple blondies and pumpkin bars with brown butter icing this fall I took a little break. But then I came across this Coconut Brown Butter Cookie by Smitten Kitchen (whose recipe are always the best) and since coconut is one of my other favorite food things, I couldn’t stay away from brown butter any longer!

The weekend before I had tried a cookie recipe that sounded so promising and was just so disappointing (overly sweet, crumbly and dry, blech) so I was thrilled when I took my first bite of these crisp on the outside, soft and buttery in the center, packed with chewy coconut cookies. The dough was totally delicious as well. My husband claims to hate all things coconut but ate quite a few. My kids went nuts for them too.

A couple things to note: Don’t try and use shredded sweetened coconut here, you want the unsweetened coconut flakes. You can make these cookies bite-size and petite or huge (I went with something in the middle and yielded ~2 dozen)- approx. baking times for different sized cookies are listed below. And see the explanation in the note as to why we’re adding a little water to the dough, and how to adjust yours if needed.

INGREDIENTS

1 cup (2 sticks) unsalted butter
2 Tbsp. water
1/2 cup + 2 Tbsp. sugar
3/4 cup packed light-brown sugar
1 large egg
1/2 tsp. pure vanilla extract
1 1/4 cups + 3 Tbsp. all-purpose flour
1 tsp. baking soda
slightly heaped 1/2 tsp. flaky sea salt (such as Maldon) or 1/4 tsp. table salt
4 cups dried, unsweetened coconut chips (I used these)

DIRECTIONS

  1. In a medium saucepan, melt butter over medium heat. It will melt, then foam, then turn clear golden and finally start to turn brown and smell nutty. Stir frequently, scraping up any bits from the bottom as you do. Don’t take your eyes off the pot as it seems to take forever (more than 5 minutes) but then turns dark very quickly. Once it is a deeply fragrant, almost nut-brown color, remove from heat and pour butter and all browned bits at the bottom into a measuring cup. Adding 2 tablespoons water* should bring the butter amount back up to 1 cup. Chill browned butter in the fridge until it solidifies, about 1 to 2 hours. You can hurry this along in the freezer, but check back and stir often so it doesn’t freeze unevenly solid.
  2. Heat oven to 350 degrees. Line baking sheets with parchment paper or a nonstick baking mat.
  3. Scrape chilled browned butter and any bits into a large mixing bowl. Add both sugars and beat the mixture together until fluffy. Add egg and beat until combined, scraping down bowl as needed, then vanilla. Whisk flour, baking soda and salt together in a separate bowl. Pour half of flour mixture into butter mixture and mix until combined, then add remaining flour and mix again, scraping down bowl if needed. Add coconut chips in two parts as well.
  4. Scoop dough into 1 or 2+ tablespoon size balls and arrange a few with a lot of room for spreading on first baking sheet; use the back of a spoon or your fingers to flatten the dough slightly. Bake first tray of cookies; 1 tablespoon scoops will take 10 to 11 minutes; 2 tablespoon scoops, 12 to 14 minutes, the 2-inch scoop used at the bakery, 14 to 16 minutes; take the cookies out when they’re deeply golden all over. If cookies have not spread as much as you see above, stir 2 teaspoons more water into cookie dough, mixing thoroughly, before baking off another tray. (See note below for full explanation.) This should do the trick, but if it does not, repeat the same with your next batch. Once you’ve confirmed that you have the water level correct, bake remaining cookies.
  5. Cool cookies on baking sheet for 1 to 2 minutes before transferring to a cooling rack. Cookies keep for up to one week at room temperature. Extra dough can be stored in the fridge for several days or in the freezer for a month or more.

*About the water: Browned butter is one of my favorite things to eat in cookies like things and least favorite things to write cookie recipes for, because when you brown the butter, water volume is lost, but not all types of butter contain the same amount of water. I find that for most standard American grocery store butters (I was using Trader Joe’s store brand here, but the equivalent would be any non-European style butter), 1 tablespoon of water per stick (1/2 cup) of butter is a sufficient replacement. However, should you find that your first batch of cookies is too thick, a little extra water is all you’ll need to get the texture right. It sounds scary, but I promise is as simple as can be.

Makes 1-3 dozen cookies, depending on size.

(Recipe from Smitten Kitchen, originally from The City Bakery)

Pear Crumble Pie

December 4, 2020

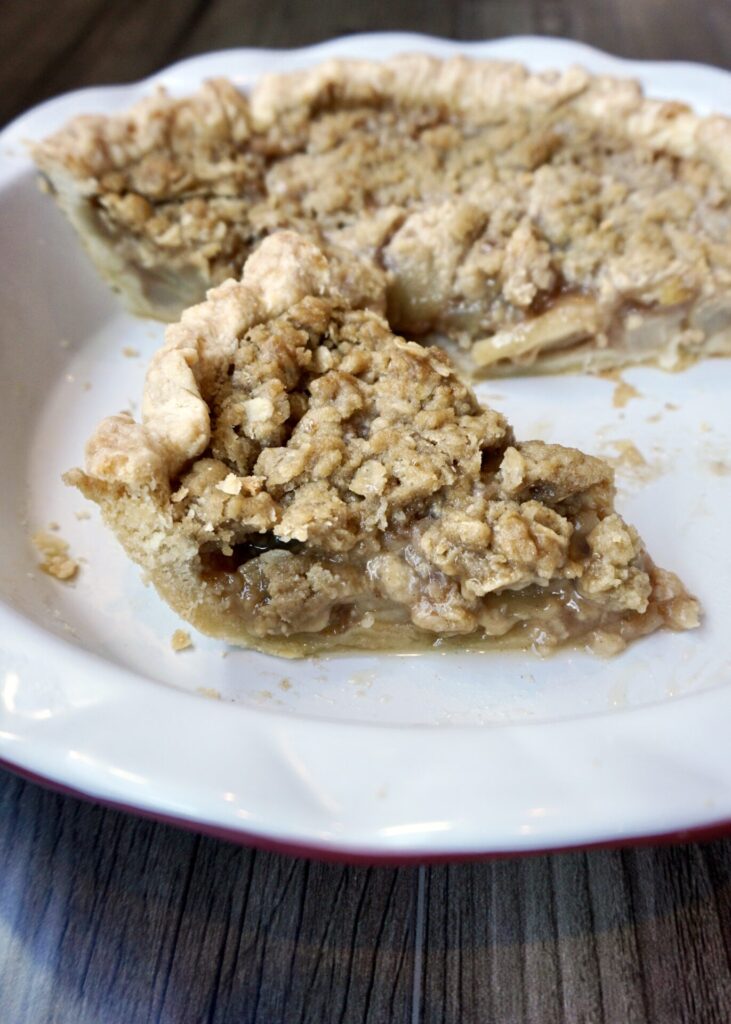
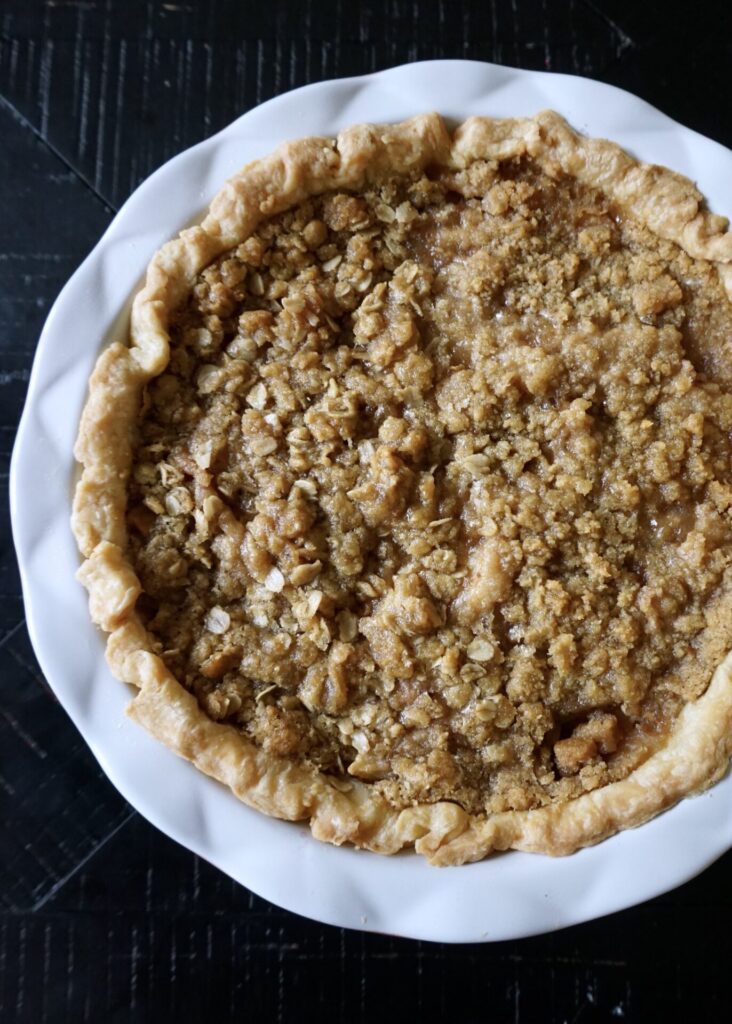
I’m so excited to be finally sharing this recipe with you! For the last 3+ years this Pear Crumble Pie has become our favorite pie ever/Thanksgiving dessert tradition. Since I only make it once a year and am often traveling for the holiday and baking it in someone else’s kitchen, it has taken me this long to take a picture and share it. But I have already passed the recipe on to a few friends who love it too. It’s a keeper! And since pears are in season much of the winter, it would also make an excellent Christmas/New Years treat!

Pear pie might sound weird, since apples are more commonly used. But I promise, once you try this combo of sweet Bartlett pears with tossed with cinnamon and vanilla in a flaky all-butter pie crust and topped with cookie crumble, you won’t go back to apple pie!

You might notice that the left half of the pie above has oats in the crumb topping and the right half does not. I figured out several years ago that I can’t digest oatmeal without side effects (which I’ll spare you the details on). So I’ve adapted this recipe to be made with and without the oats and it’s great either way. Though I do love the heartiness the oatmeal provides to the crumble, and recommend using it if you can!

Lastly, please make your own pie crust. It’s really not hard. And it tastes so SO much better than store bought. This is my favorite pie crust recipe. It’s buttery and flaky and perfect. (And can easily be doubled when you want to use it in a recipe that calls for a top and bottom pie crust!)

Pear Crumble Pie

INGREDIENTS

Pie Crust:
1 1/4 cups all-purpose flour
1/2 Tbsp. sugar
1/4 tsp. sea salt
1/2 cup (1 stick) cold unsalted butter, cubed
3-4 Tbsp. ice water
1 egg white, lightly beaten

Filling:
5 large Bartlett pears (about 2 lbs.), peeled, cored and thinly sliced (use pears that are ripe but still firm- not too squishy yet- so they don’t get mushy once baked)
1/4 cup all-purpose flour
1/2 tsp. sea salt
1/2 cup sugar
1 tsp. ground cinnamon
1/2 a vanilla bean, seeds scraped out (or 1 tsp. pure vanilla extract)

Crumble:
1/2 cup all-purpose flour
1/2 cup rolled oats (or replace with another 1/2 cup of all-purpose flour)
1 cup brown sugar
1/2 cup (1 stick) unsalted butter, room temperature

DIRECTIONS

  1. To make the pie crust, mix the flour, sugar, and salt in a food processor (or by hand with a whisk). Add the butter and pulse until coarse mill forms (or cut in the butter by hand with a pastry blender until only pea-size crumbs remain). Gradually blend in enough ice water until the dough clumps (or mix in a Tbsp. at a time by hand). Form the dough into a large ball and flatten into a disk. Wrap in plastic and chill 2 hours or overnight.
  2. Roll out the pastry dough on a floured surface until large enough to cover a 9-inch pie dish. Drape the rolled out pastry over the pie dish and press it down to fit. Trim and crimp the edges. Brush the bottom and sides of the crust with the beaten egg white. 
  3. To make the filling, in a large bowl add the vanilla seeds/extract, pears, flour, salt, sugar and cinnamon. Use your hands or a spoon to carefully combine the ingredients together, making sure the pears don’t break apart. Set aside.
  4. To make the crumble, in a small bowl, combine the flour, oats (if using), brown sugar and butter. Using a pastry cutter/fork (or your fingers), combine the mixture until it resembles large crumbs.
  5. Spoon the filling into the pie crust. Top with the crumble mixture.
  6. Preheat oven to 325 F. (If you are worried about your filling spilling over, you can place the pie pan on top of a large rimmed baking sheet to catch any dripping while it bakes. I used a deep dish pie pan and didn’t need to.)
  7. Cover the exposed pie crust with thin strips of aluminum foil or a pie shield and bake in preheated oven for 35 minutes. Remove foil/shield and bake for another 25 minutes until the filling is bubbling and the top is golden and crisp. Let cool for at least an hour before serving. Slice and serve with vanilla ice cream or whipped cream. 

Makes 1 pie.

(Adapted from Bitchin Camaro)

Hello Robin Mackles’more Cookies

October 30, 2020

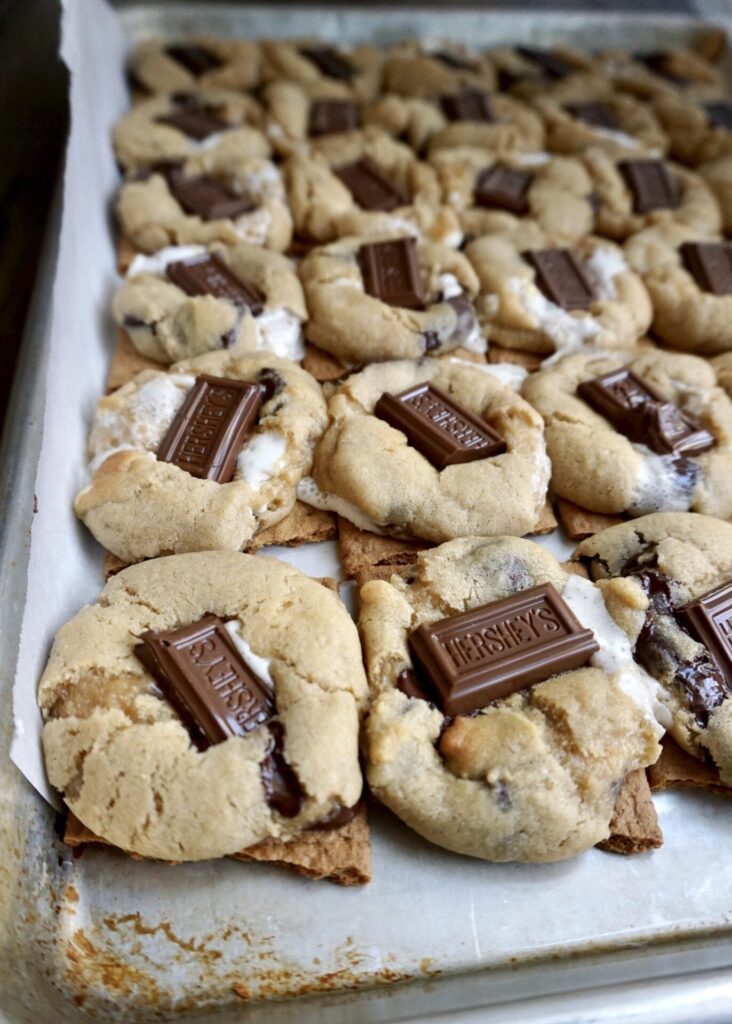
I promise I’ll share some healthier recipes next week… no one wants to think about grilled chicken and fish or salad when they’re about to stuff their face full of Halloween treats! So I’m posting these cookies we made for the first time last weekend… they were just amazing and have to be shared right away.

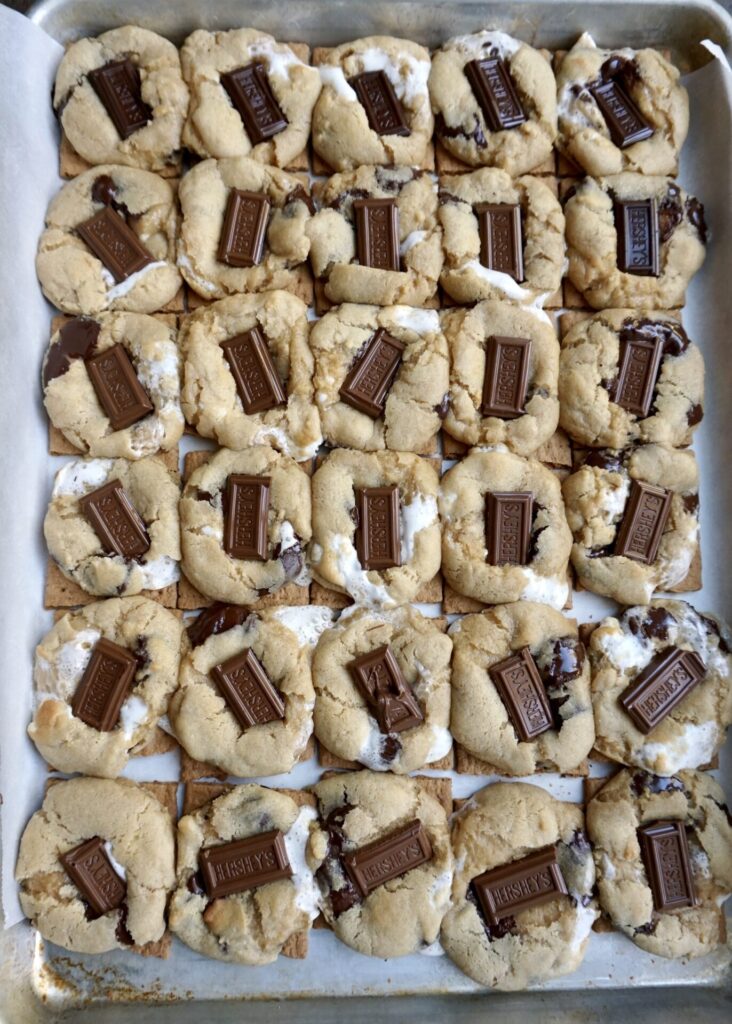
There’s a famous cookie shop in downtown Seattle called Hello Robin. We’ve been there and loved the cookies sandwiched with Molly Moon’s ice cream (my favorite local ice cream shop!) but we didn’t try their famous Mackles’more cookie (next time!). But now we have the recipe and will be making them at home forevermore. The Mackles’more is a dark chocolate chip cookie with marshmallows (and cinnamon- yum) baked on top of a graham cracker and topped with a milk chocolate square when it’s hot out of the oven. It sounds complicated but it’s not at all. You do need to freeze the dough for 1 hour before baking which requires some patience but it’s worth the wait!

I didn’t buy Theo chocolate because it’s expensive and I already had Ghirardelli and Hershey’s on hand. But Theo chocolate is amazing (and the factory tour is super fun if you’re ever visiting Seattle…) so I bet it would be even better with it!

Hello Robin’s Mackles’more Cookies

INGREDIENTS

2 3/4 cups all-purpose flour
1 tsp. ground cinnamon
1 tsp. kosher salt
1 tsp. baking soda
3/4 cup unsalted butter, softened
1 cup packed light brown sugar
1/2 cup granulated sugar
2 large eggs
1 tsp. pure vanilla extract
4 oz. dark chocolate (70%), cut into chunks, or 3/4 cup of dark chocolate chips (I used Ghirardelli 60% bittersweet chocolate chips)
1 cup packed mini marshmallows
36 square-sized store-bought graham crackers (Honey Maid brand recommended, I could only fit 30 on the baking sheet so that’s how many I used)
7 1/2 oz. milk chocolate squares, halved (I used Hershey’s milk chocolate and special dark chocolate bars)

DIRECTIONS

  1. Line two baking sheets with parchment paper.
  2. Whisk together the flour, cinnamon, salt and baking soda in a medium bowl; set aside. Cream the (softened) butter, brown sugar and granulated sugar in a stand mixer on medium-high speed until pale and fluffy, about 3 minutes. Add the eggs, one at a time, mixing on medium speed for 15 seconds after each addition. Add the vanilla and mix until smooth. Add the dry ingredients and mix until combined. Fold in the dark chocolate and the marshmallows.
  3. Using a medium cookie scoop (about 1 1/2 tablespoons), scoop the dough into (30-36, depending on how many graham crackers you’re using) balls and place them close together on one of the prepared baking sheets. Freeze for at least 1 hour.
  4. Preheat the oven to 400 degrees F.
  5. Place the graham cracker halves side by side on the second prepared baking sheet. Place 1 ball of the frozen cookie dough on each graham cracker. Bake until the cookies are puffed and just turning golden, 10 to 12 minutes. Remove the baking sheet from the oven and immediately press 1 piece of milk chocolate onto each hot cookie–be sure to really press the chocolate into the soft cookie so that when it melts, it puddles on the cookie and doesn’t run off.

Makes 30-36 cookies.

(Adapted from Female Foodie)

Mini Key Lime Pies

September 4, 2020

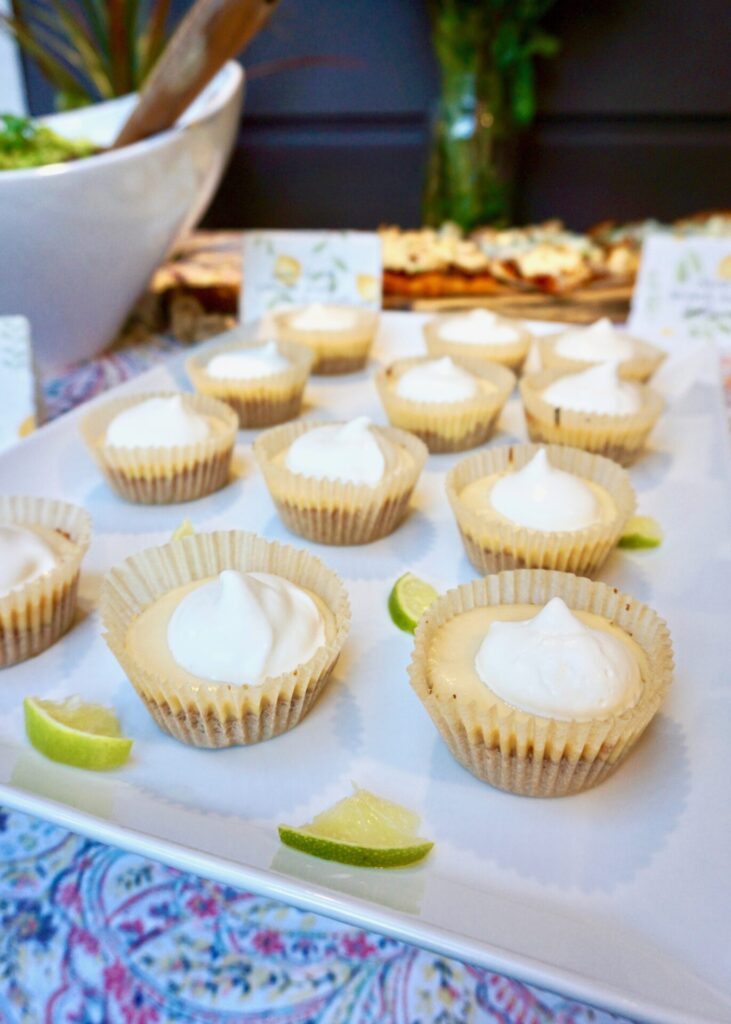
I’m loving mini desserts lately! Like these mini cheesecakes, these tiny key lime pies are quick to bake with my 3 small helpers and just the right size for one or two a piece. They’re tart yet sweet and perfect with a dollop of homemade whipped cream. (If you’d rather bake a full size pie, there are instructions included below the recipe.)

Mini Key Lime Pies

INGREDIENTS

1 1/2 cups graham cracker crumbs (about 10 full sheet graham crackers)
6 Tbsp. unsalted butter, melted
1/3 cup sugar

4 oz. full-fat cream cheese, softened to room temperature
4 large egg yolks
14 oz. can full-fat sweetened condensed milk
1/2 cup (120ml) key lime juice*
lime slices and whipped cream, for garnish (optional)

DIRECTIONS

  1. Preheat the oven to 350 F. Line a 12-count muffin pan with liners and a second 12-count muffin pan with only 4 (since this recipe makes only around 16). Set pans aside.
  2. Make the crust: Before you begin, here are all of my tips for a perfect graham cracker crust. If you’re starting out with full-sheet graham crackers, you can use a food processor or blender to grind them up. Or crush them in a zipped top bag with a rolling pin. Mix the graham cracker crumbs, melted butter, and granulated sugar together with a rubber spatula in a medium bowl until combined. The mixture will be thick, coarse, and sandy. Press a heaping tablespoon of mixture down into each liner, making sure the crust is tight and compact. You might have a little crust leftover. If so, press a little more into each liner—if desired! Pre-bake the crusts for 5 minutes. Remove from the oven.
  3. Make the filling: In a large bowl using a handheld or stand mixer fitted with a whisk attachment, beat the cream cheese on high speed until smooth, about 1 minute. On medium-high speed, beat in the egg yolks, scraping down the sides as needed. On high speed, beat in the sweetened condensed milk and lime juice until combined.
  4. Pour the filling evenly into each crust. Bake for 15-16 minutes or until the centers of the pies only slightly jiggle (I check this by wiggling the muffin pan—with an oven mitt on– while it’s still in the oven). Allow the pies to cool at room temperature in the pan set on a wire rack. Once completely cool, place the pan in the refrigerator for at least 2 hours and up to 1 day.
  5. Once chilled, serve the key lime pies cold with whipped cream and a lime slice if desired. Store leftover pies in the refrigerator (covered) for up to 1 week. If they last that long!

NOTES:

*Key Lime Juice: For the best flavor, make sure you use key lime juice. You can juice your own key limes or buy it from the store. It is usually with the regular lime and lemon juice in the juice aisle. I buy Nellie & Joe’s brand. In a pinch, you can use regular lime juice.

For a Full-Size Key Lime Pie: This is the same exact recipe I use for classic key lime pie (and sometimes I add the zest of 1 lime to the filling, which you can add to these mini pies as well). To make the pie, simply use this crust and filling recipe. Press crust into a 9-inch pie dish. Pre-bake for 12 minutes at 350 F. Pour in filling. Bake for 18 minutes, then allow to cool at room temperature before chilling in the refrigerator for 4 hours – overnight.

Makes ~16 mini key lime pies.

(Adapted from Sally’s Baking Addiction)