I’ve made this knead-free bread a few times now and every time am surprised by how very little effort can yield such good results! You toss a few ingredients together in a bowl the night before (for best flavor) and let it sit. The next day you form it into a round and bake it in the oven inside a hot dutch oven pot with a lid on top. The trapped steam turns the crust extra crisp and the inside is soft and chewy. Perfect alongside salad or cup of soup.
As you can see, I use parchment paper for easy transfer of the dough to the pot. (I also bake all of my pizzas on parchment in a very hot oven and have never had trouble with the parchment burning.) My family devoured this loaf in one sitting, but should you have leftovers they can be frozen in a freezer bag and defrosted as needed.
No-Knead Dutch Oven Bread
INGREDIENTS
3 cups all-purpose flour + more for shaping 2 tsp. sea salt 1 tsp. active dry yeast OR 3/4 tsp. instant yeast 1 1/2 cups warm water (about 110-115 degrees F)
DIRECTIONS
In a large bowl, whisk flour, salt and yeast until well mixed. Pour in warm water and use a wooden spoon to stir until a shaggy dough forms. The mixture will be wet and very sticky to the touch.
Cover bowl tightly with plastic wrap and set aside in a warm place 8 to 18 hours until dough rises, bubbles and flattens on top.
Heat oven to 450 degrees F. Once oven is preheated, place a 6-quart Dutch oven (with cover) in oven 30 minutes before baking. (I preheated my dutch oven with the oven and it was plenty hot.)
Punch down dough. Generously flour a sheet of parchment paper; transfer dough to parchment and, with floured hands, quickly shape into a ball. Place dough on parchment paper and sprinkle top lightly with flour. Top with a sheet of plastic wrap and let rest 30 minutes. (I let my dough ball rest uncovered while the oven preheated, about 20 minutes.)
Remove Dutch oven from oven. Uncover dough and carefully transfer to Dutch oven, with or without parchment paper beneath (if bottom of Dutch oven is not coated with enamel, keep parchment paper beneath dough). Cover Dutch oven and return to oven.
Bake bread 30 minutes covered, then another 10 to 15 minutes uncovered until dough is baked through and golden brown on top. Cool slightly before slicing. (My oven runs hot and it was done after 35-40 minutes total- the bread will sound hollow when tapped.)
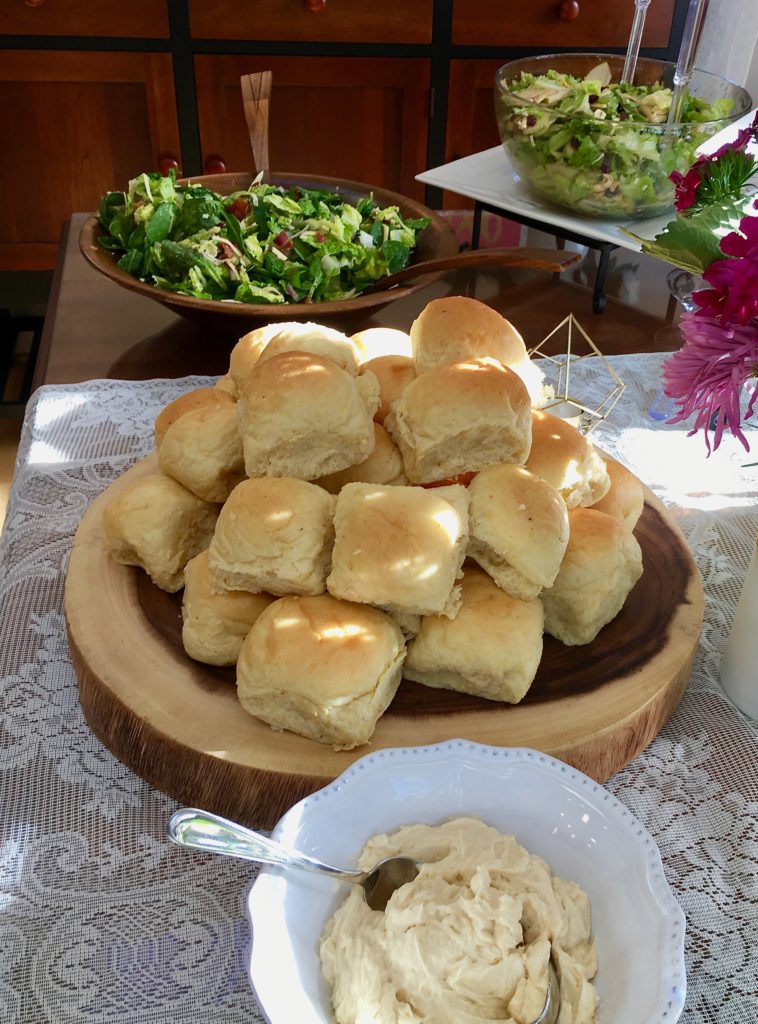
Baking is my first love. I learned to bake alongside my mom as I grew up and love making breads and desserts more than anything! My mom made some amazing rolls and they’ve always been my top comfort food. I still use her recipe to this day for classic dinner rolls and cinnamon rolls that are better than I’ve had in any bakery. I found today’s recipe on Mel’s site– you’ll see me share a lot of her recipes in the future. I was intrigued by the addition of cornmeal to the dough and had to try it out. Now I can’t stop making these because they’re just sooo good! This picture was taken when I took them to a friend’s baby shower and let’s just say I got a lot of recipe requests.
Cornmeal Dinner Rolls
INGREDIENTS
2 cups milk (1%, 2% or whole) 2/3 cup yellow corn meal 1 1/2 Tbsp. instant yeast (or active dry yeast*) 1/2 cup (1 stick) butter 1/3 cup granulated sugar 1 tsp. salt 3 large eggs 5 1/2 – 6 cups all-purpose flour (or you can use half white and half whole wheat flour)
DIRECTIONS
In a medium saucepan set over medium heat, warm the milk to just below a simmer; tiny bubbles will appear around the edges (this is called scalding milk). Add the cornmeal (SLOWLY) and cook and stir constantly until the mixture is thickened and bubbling. It should be the consistency of porridge before taking off the heat.
Pour the cornmeal mixture into the bowl of a stand mixer fitted with the dough hook or a large bowl (if mixing by hand) and let cool until lukewarm. Add the yeast, butter and sugar (if you dissolved active dry yeast with a bit of water and sugar until it foamed, add it now). Mix.
Add the salt and eggs. Mix well. Add the flour gradually until a soft dough forms. Knead for 2-3 minutes (slightly longer if you use half whole wheat flour).
Transfer the dough to a greased bowl and cover with lightly greased plastic wrap; let rise until doubled.
Portion the dough into 24 equal pieces (about 2.75 to 3 ounces each) and roll into a taut ball on the counter. Place each roll on a large, rimmed baking sheet lined with parchment paper, spacing about an inch apart to allow for rising (on a 11X17-inch rimmed baking sheet, I fit 24 rolls on the sheet – four across, six down). Cover lightly with greased plastic wrap. Let the rolls rise until doubled (mine took about 1 1/2 hours).
Bake at 375 degrees for 14-17 minutes (I baked for 12-15 min), until lightly browned and baked through. Remove from the oven and brush with butter while still warm.
*If you need/want to use active dry yeast instead of instant yeast, change the amount of yeast to 2 tbsp. active dry and dissolve the yeast in 1/2 cup warm water and 1 tbsp. sugar. Let the yeast mixture activate and foam (approximately 5 minutes) before adding it to the cornmeal mixture with the butter and 1/3 cup sugar
These are the go-to dinner rolls in our family. It’s the same dough (with the addition of some whole wheat) used in my cinnamon rolls, orange rolls, and lemon sticky buns. They’re soft and buttery and sweet. And you’ll eat way too many.
I don’t typically use instant yeast when I make bread. But in this case it’s great because it means you only have to let it rise once. After you make the dough you immediately shape it into rolls and let them rise in the pan for an hour or so. (NOTE: I’ve done it both ways- two rises and one- with success. Go with whatever is most convenient. If you’re not ready to bake the rolls in an hour, let the dough complete an initial rise in the bowl. You can even make it the night before and stow it in the refrigerator.)
I made them a few days ago for a baby shower and whipped up the simplest honey butter to serve alongside. Here’s the recipe : 1 stick (1/2 cup) butter (softened to room temperature) + 3 Tbsp. honey + pinch salt (if your butter is unsalted like mine). Use a spatula to combine until smooth. Spread over warm rolls and be happy.
Buttery Sweet Whole Wheat Rolls
INGREDIENTS
1 1/2 cups white whole wheat flour
1 1/2 -2 cups all-purpose flour
1 Tbsp. instant yeast
1 tsp. salt
1/4 cup sugar
1/4 cup butter, melted
1 egg, whisked
1 cup + 2 Tbsp. warm milk
DIRECTIONS
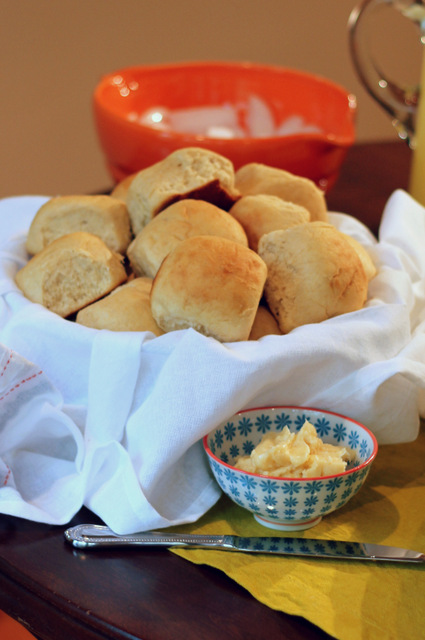
1. In a large bowl, whisk to combine the whole wheat flour, yeast, salt, and sugar. Pour in butter, egg, and milk. Stir until ingredients form a thick paste. Continue adding flour, 1/2 cup at a time, until the dough pulls away from the sides of the bowl. Turn onto a lightly floured surface and knead, adding enough flour to prevent sticking, until smooth, about 8-10 minutes.
2. Divide dough into 12 even portions and form into rolls. Place in a lightly greased 9×13 baking dish. Cover, and let rise until doubled in size, about 1 hour.
3. Preheat oven to 350 F.
4. Bake rolls in preheated oven for about 15 minutes, until they are light golden brown on top. Remove from the oven and remove from the pan to let cool on a wire rack.
Makes 12 rolls.
(Adapted from a recipe my mom received at a church function many years ago.)
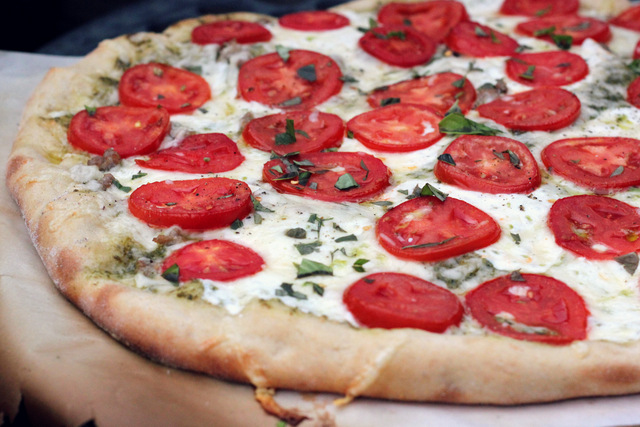
I created this pizza dough recipe almost five years ago and have been using it regularly ever since. Haven’t you noticed? I post pizzas constantly. (There are, um, more than 30 pizzas in the index!!) Obviously, we love it! I decided it was time for a few updates (I just streamlined some of the instructions) and to be re-shared.
If you’ve never made your own pizza dough, you must! A puffed and chewy homemade crust is worth the little effort. I promise it’s easier than you think. And after a few times it’ll be second nature- you’ll probably even have the recipe memorized. If you’ve never worked with yeast, don’t be intimidated- this recipe is a great place to start.
A few notes before you begin: (As always, if you have any questions, leave them in the comments section and I will try to respond to you as soon as possible.)
on yeast– Here I use active dry (I’ve never tried this dough with instant yeast, if I do someday I’ll update with the results), which needs to be proofed in warm water before adding the other ingredients. Adding the sweetener (honey or sugar) to the water just speeds up the process as yeast thrives on sugar. Water temperature is important: too hot and you’ll kill your yeast, too cold and it won’t activate properly. You can use a thermometer to be exact, but I usually test the water with my finger and aim for what feels hot but not scorching (if I have to pull it out quickly, it’s too hot).
sugar vs. honey– Either will work. I just prefer the flavor and health benefits of honey. Before my daughter turned 1 made it with sugar and hardly noticed a difference.
about the flours– Why bread flour? Because it has a higher gluten content and creates a chewier puffier crust. All-purpose can be used instead but the final result won’t be quite the same. Why white whole wheat flour? Well, because I like to use at least some whole wheat flour for nutrition and white whole wheat is ground finer resulting in a less dense texture and lighter taste. You can use regular whole wheat flour and the dough will be a bit tougher. You can use all white flour (bread or all-purpose) and you’ll just need to add more of it during the kneading process (white flour doesn’t absorb as much water as whole wheat).
pizza stones– To achieve a perfectly puffed, crispy-bottomed crust you need to use a pizza stone. Round or square- I don’t care as long as it’s HOT. Preheat to 450 F (or even 500 F if your oven runs cool) for a good 30+ minutes before baking. (I’ve detailed your options for transferring your crust to and from the oven in the directions below.) And remember to carefully follow any directions for cleaning your stone. Soap should not be used- only hot water.
letting the dough rest– This step might sound unnecessary and inconvenient, but I promise it makes a huge difference. After your dough rises and you punch it down, let it rest for at least 5, preferably 10 minutes before forming your crust. I’ve been in a hurry many times and immediately tried to shape my crust and always end up tearing holes in the dough. I don’t know the science behind it but letting the dough rest makes it stretchy and pliable and so much easier to work with.
making the dough ahead of time: If you need to make your dough ahead of time (earlier in the day) it can be refrigerated after step 4 (placing it in a bowl and covering it) and then taken out of the fridge to warm up about an hour before you’ll be using it. It will rise slightly in the fridge, but needs to warm to room temperature and finishing the rising process before it is ready to handle. I’ve never refrigerated it overnight and don’t think it would hold up very well. I have heard that you can freeze pizza dough for later use, but haven’t tried it yet myself.
Alright, that’s it.
Oh, if you’re wondering about the pizza pictured above, I’ll be sharing that recipe next!
Honey Whole Wheat Pizza Dough
INGREDIENTS
1 cup warm water (100-120 degrees F, over 120 degrees will kill your yeast)
2 tsp. honey (or sugar)
2 tsp. active dry yeast
1 cup bread flour (+ approx. 1/4 cup more for kneading)
1 cup white whole wheat flour (or all-purpose flour*)
1 tsp. sea salt
2 Tbsp. extra virgin olive oil
DIRECTIONS
1. In a glass or plastic bowl (metal can negatively affect yeast), dissolve honey in warm water. Add yeast and let sit (at least 10 minutes) until yeast is active and bubbly.
2. In a large mixing bowl, whisk together all purpose flour, white whole wheat flour, and salt. Create a well in the center.
3. Once the yeast mixture is ready, pour it into the well in your flour mixture bowl. Add the extra virgin olive oil. Using a spatula and then your fingers, mix the dough until it pulls away from the side of the bowl.
4. Knead the dough on the counter top, adding up to 1/4 cup more flour just until it is no longer sticking to the counter and has a smooth texture. (You can brush a little olive oil onto your fingers for the kneading process.)
5. Place the dough in a greased bowl and cover. Let rise until doubled in size, about an hour. You can test if your dough has risen enough by poking it with a finger. If the imprint stays, then the dough is ready.
6. Deflate the dough into a ball, and let it rest on your counter for at least 10 minutes before you create the crust.
7. Preheat the oven and pizza to 450 degrees F. This will take 20+ minutes. A scorching hot pizza stone is the key to getting that puffed evenly cooked crust.
8. To shape your crust you will simply use your hands and gravity. DO NOT use a rolling pin- it will press out all of the air that has formed in your dough. Take the ball of dough in your hands and simply begin pulling it around the edges. It should start to stretch easily. Rotate it around your first making sure you are stretching each side evenly, so that you have a round crust. The middle will be fairly thin, and you want to leave the edges thicker so they will puff up.
9. Now you have several options. First is to open the preheated oven, sprinkle with stone with semolina flour or cornmeal, and place your crust directly on the stone. Then add your sauce and toppings and close the oven. This allows a fair bit of heat to escape the oven though so it is not ideal. The second option is to place your crust on a sheet of parchment paper (dusted with cornmeal). You can then add the sauce and toppings. Carry the pizza to the oven and place it on the stone (parchment paper stays beneath it). This makes removing the pizza from the oven easy as well-you simply pick up the parchment paper! (Be very careful though, as it sometimes rips.) Last of all, if you own a pizza peel, you can place your crust directly on the peel (dust it with cornmeal first) or your parchment paper directly on the peel, add your sauce and toppings, then use the peel to slide the crust or parchment onto the pizza stone. Once it is cooked you will slide it off the stone back onto the peel. If you are cooking multiple pizzas the second and third options are best, as they do not require you to remove the stone from the oven and it will stay hot.
10. Bake your pizza for approximately 10-12 minutes, until the crust is puffed and starting to turn golden brown, and the cheese is melted and bubbling.
11. Once you have removed your pizza from the oven, let it rest for a few minutes before slicing. Enjoy!
*You’ll need to add some extra flour during the kneading process if you use all white flours (because white flour absorbs less water than whole wheat flour does)
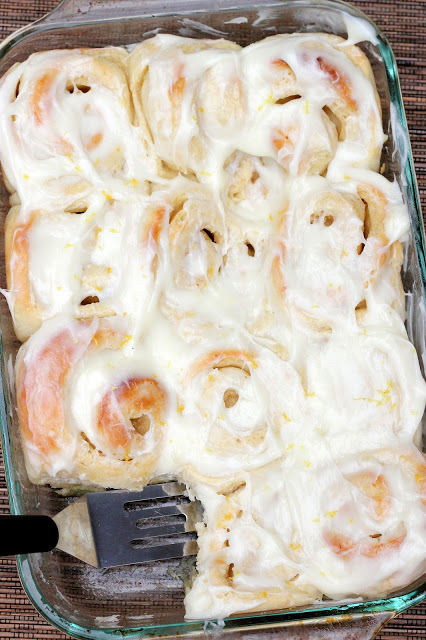
Despite my difficulty getting around lately, I’ve been determined to do two main things: buy stuff for the baby (accomplished thanks to Amazon and a surprising number of stores that provide free wheelchairs/motorized carts- which is only mildly embarrassing) and make a few treats. By treats I mean anything homemade. Because we don’t get much of that around here lately. Over the weekend I managed to serve brunch, highlighted by these fresh-from-my-own-oven sticky rolls. It doesn’t get more homey. I used my mom’s foolproof sweet roll dough recipe (featured in our favorite cinnamon rolls), just dressed a bit differently. Lemon and nutmeg dusted throughout the rolls, lemon and nutmeg and ginger in the filling, and even more lemon and cream cheese in the glaze. The lemon is bright and sweet, not overpowering. And the spices provide just a hint of flavor in the background.
I’m also excited to announce that since Tuesday, I’ve been officially removed from bedrest! I’ve reached the 35-week mark and after reassuring ultrasound results (baby is looking big and healthy), my doctor told me I’m allowed to do whatever activity I can manage comfortably. For an unknown reason (the baby is still dropped just as low and my signs of labor have actually progressed further), I’m feeling and moving better by the day. Less pain + less laying around = happier me. But I’m definitely still taking it easy- the intense discomfort could quickly return or I could be delivering a baby any day!
Lemon Sticky Rolls
INGREDIENTS
Dough:
6-8 cup unbleached all-purpose flour
2 Tbsp. instant yeast
2 tsp. salt
1/2 cup sugar
zest of 2 lemons (reserve the juice for using in the glaze below*)
3/4 tsp. ground nutmeg
1/2 cup butter, melted
2 eggs, whisked
2 1/4 cups warm milk
Filling:
1 1/2 cups sugar
heaping 1/4 tsp. ground nutmeg
3/4 tsp. ground ginger
zest and juice of 2 lemons
6 Tbsp. butter, melted
Lemon Cream Cheese Glaze:
8 oz. cream cheese, softened
*juice of 2 lemons
2 cups powdered sugar
extra lemon zest for sprinkling on top
DIRECTIONS
1. In a large bowl combine 3 cups flour, yeast, salt, sugar, lemon zest, and nutmeg. Whisk to combine. Pour in wet ingredients (butter, eggs, and milk). Stir until it is a thick paste. Add the remaining flour, 1/2 cup at a time, until it comes together into a ball.
2. Lightly flour a flat surface, and knead the dough, adding more flour to prevent sticking, 8-10 minutes, until smooth. Spray the inside of a bowl with cooking spray, place the dough inside, cover, and let rise in a warm place until doubled, about 1 hour.
3. To make the filling, in a small bowl combine the sugar, nutmeg, ginger, and lemon zest. Slowly add the lemon juice, mixing with your fingers or a fork, until the mixture resembles wet sand (you will probably not need to use all of the juice).
4. Punch down the dough and divide in half. Roll out each half into a large rectangle. Brush melted butter over the surface of the dough. Spread half of the prepared filling over each rectangle of dough. Roll up lengthwise. Cut each log into 12 evenly sized pinwheels. Place into lightly greased 9×13 baking pans. Cover each pan and let rise until doubled in size, about 1 hour.
5. Preheat oven to 350 F. Bake rolls in preheated oven for 15-18 minutes, until golden on top. (DO NOT over-bake. Soft and doughy is better than browned.) Remove from the oven and place on a cooling rack.
6. While the rolls are baking, prepare the glaze. Beat the cream cheese with an electric mixer unti light and fluffy. Beat in the lemon juice and powdered sugar until light and smooth.
7. Spread the glaze over the hot rolls, dividing it among the two pans. Sprinkle with extra lemon zest. Serve warm.
Fills 2 9×13 pans (about 24 rolls).
(Dough from here, Lemon Sticky Rollsadapted from The Kitchn)

/ 1 COMMENT / Share